Kubernetes The Hard Way Part 2

This is the continue blog from kubernetes the hard way part 1. in this second part i will write on how to setting up the kubernetes instances, setting up the load balancer, kubernetes configuration in aws and many more. This will cover the 03-compute-resource and 04-certificate-authority from kelsey hightower docs
Load Balancer In AWS
There is several load balancer available in AWS. I will try to explain only two ALB & NLB in short on each of the type and which one that will be using for this case
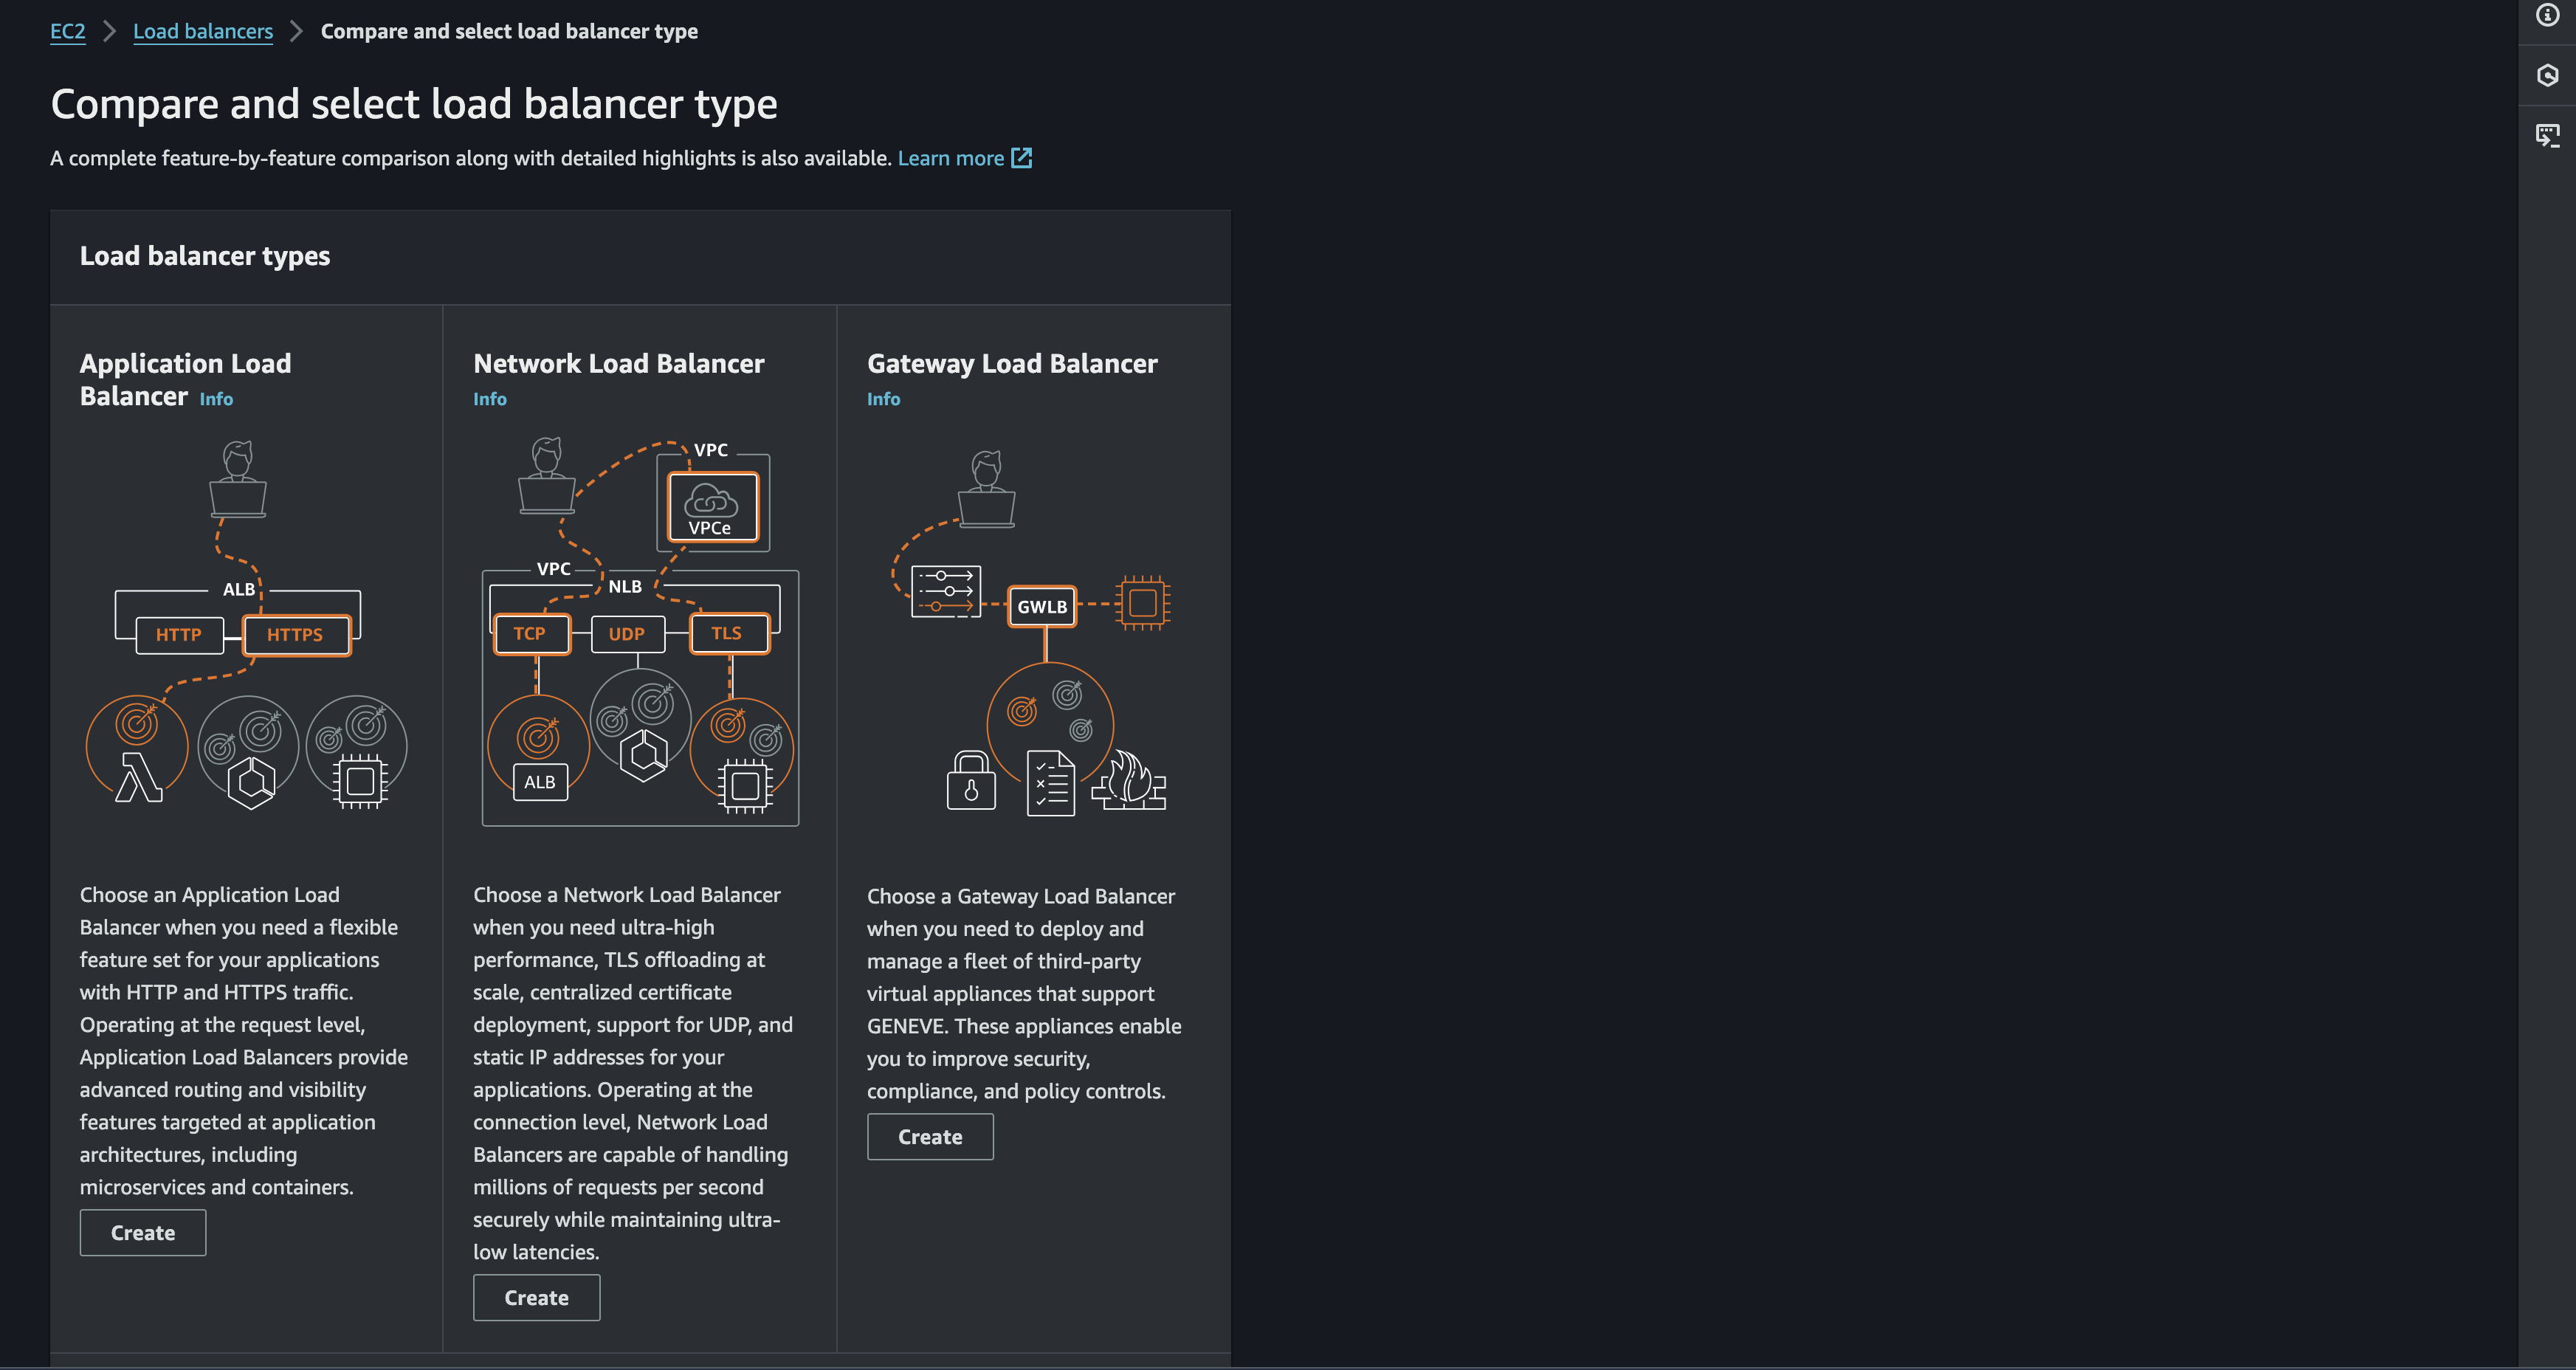
Application Load Balancer
As explained in the image. we should choose the Application Load Balancer when we need a flexible feature set for the applications with HTTP and HTTPS traffic. For example:
Content-based routing for A/B testing:
Example: We want to test a new version of the website's homepage. We can configure an ALB to send a percentage of traffic to the new homepage while the rest goes to the original, allowing you to compare performance and user preferences.
Load balancing across different versions of an application:
Example: We have multiple versions of a REST API deployed (v1, v2, v3). An ALB can route traffic to the correct version based on request headers or other criteria.
Network Load Balancer
Different from ALB behavior. NLB will be operating at the network layer. forwarding traffic based on IP addresses and ports. This will be the most suitable when we need setting up a kubernetes cluster. But why NLB is important for this case?
High Availability for the Control Plane
the NLB evenly distributes incoming traffic across multiple controller nodes. This prevents any single node from becoming overwhelmed and ensures that your cluster remains responsive, even under heavy load. and also If a controller node becomes unhealthy (crashes, network issues), the NLB automatically detects the failure and stops sending traffic to that node. It redirects traffic to the remaining healthy nodes, ensuring the cluster stays up and running.
Exposing the Kubernetes API Server Securely
The NLB provides a single, publicly accessible endpoint (its DNS name) that clients can use to interact with the Kubernetes API server (running on port 6443).
Scalability and Flexibility
As the cluster grows and the cluster need more controller nodes, We can easily add them to the NLB's target group. The NLB will automatically start distributing traffic to the new nodes. also NLBs are highly configurable. We can adjust settings like health checks, timeouts, and SSL certificates to meet your cluster's specific needs.
Configuring NLB in AWS
As defined in previous section. NLB will be used to control traffic in the upcoming kubernetes cluster. So how to setting it for this case? i will start to define the process. The process will be divide in 4 phase
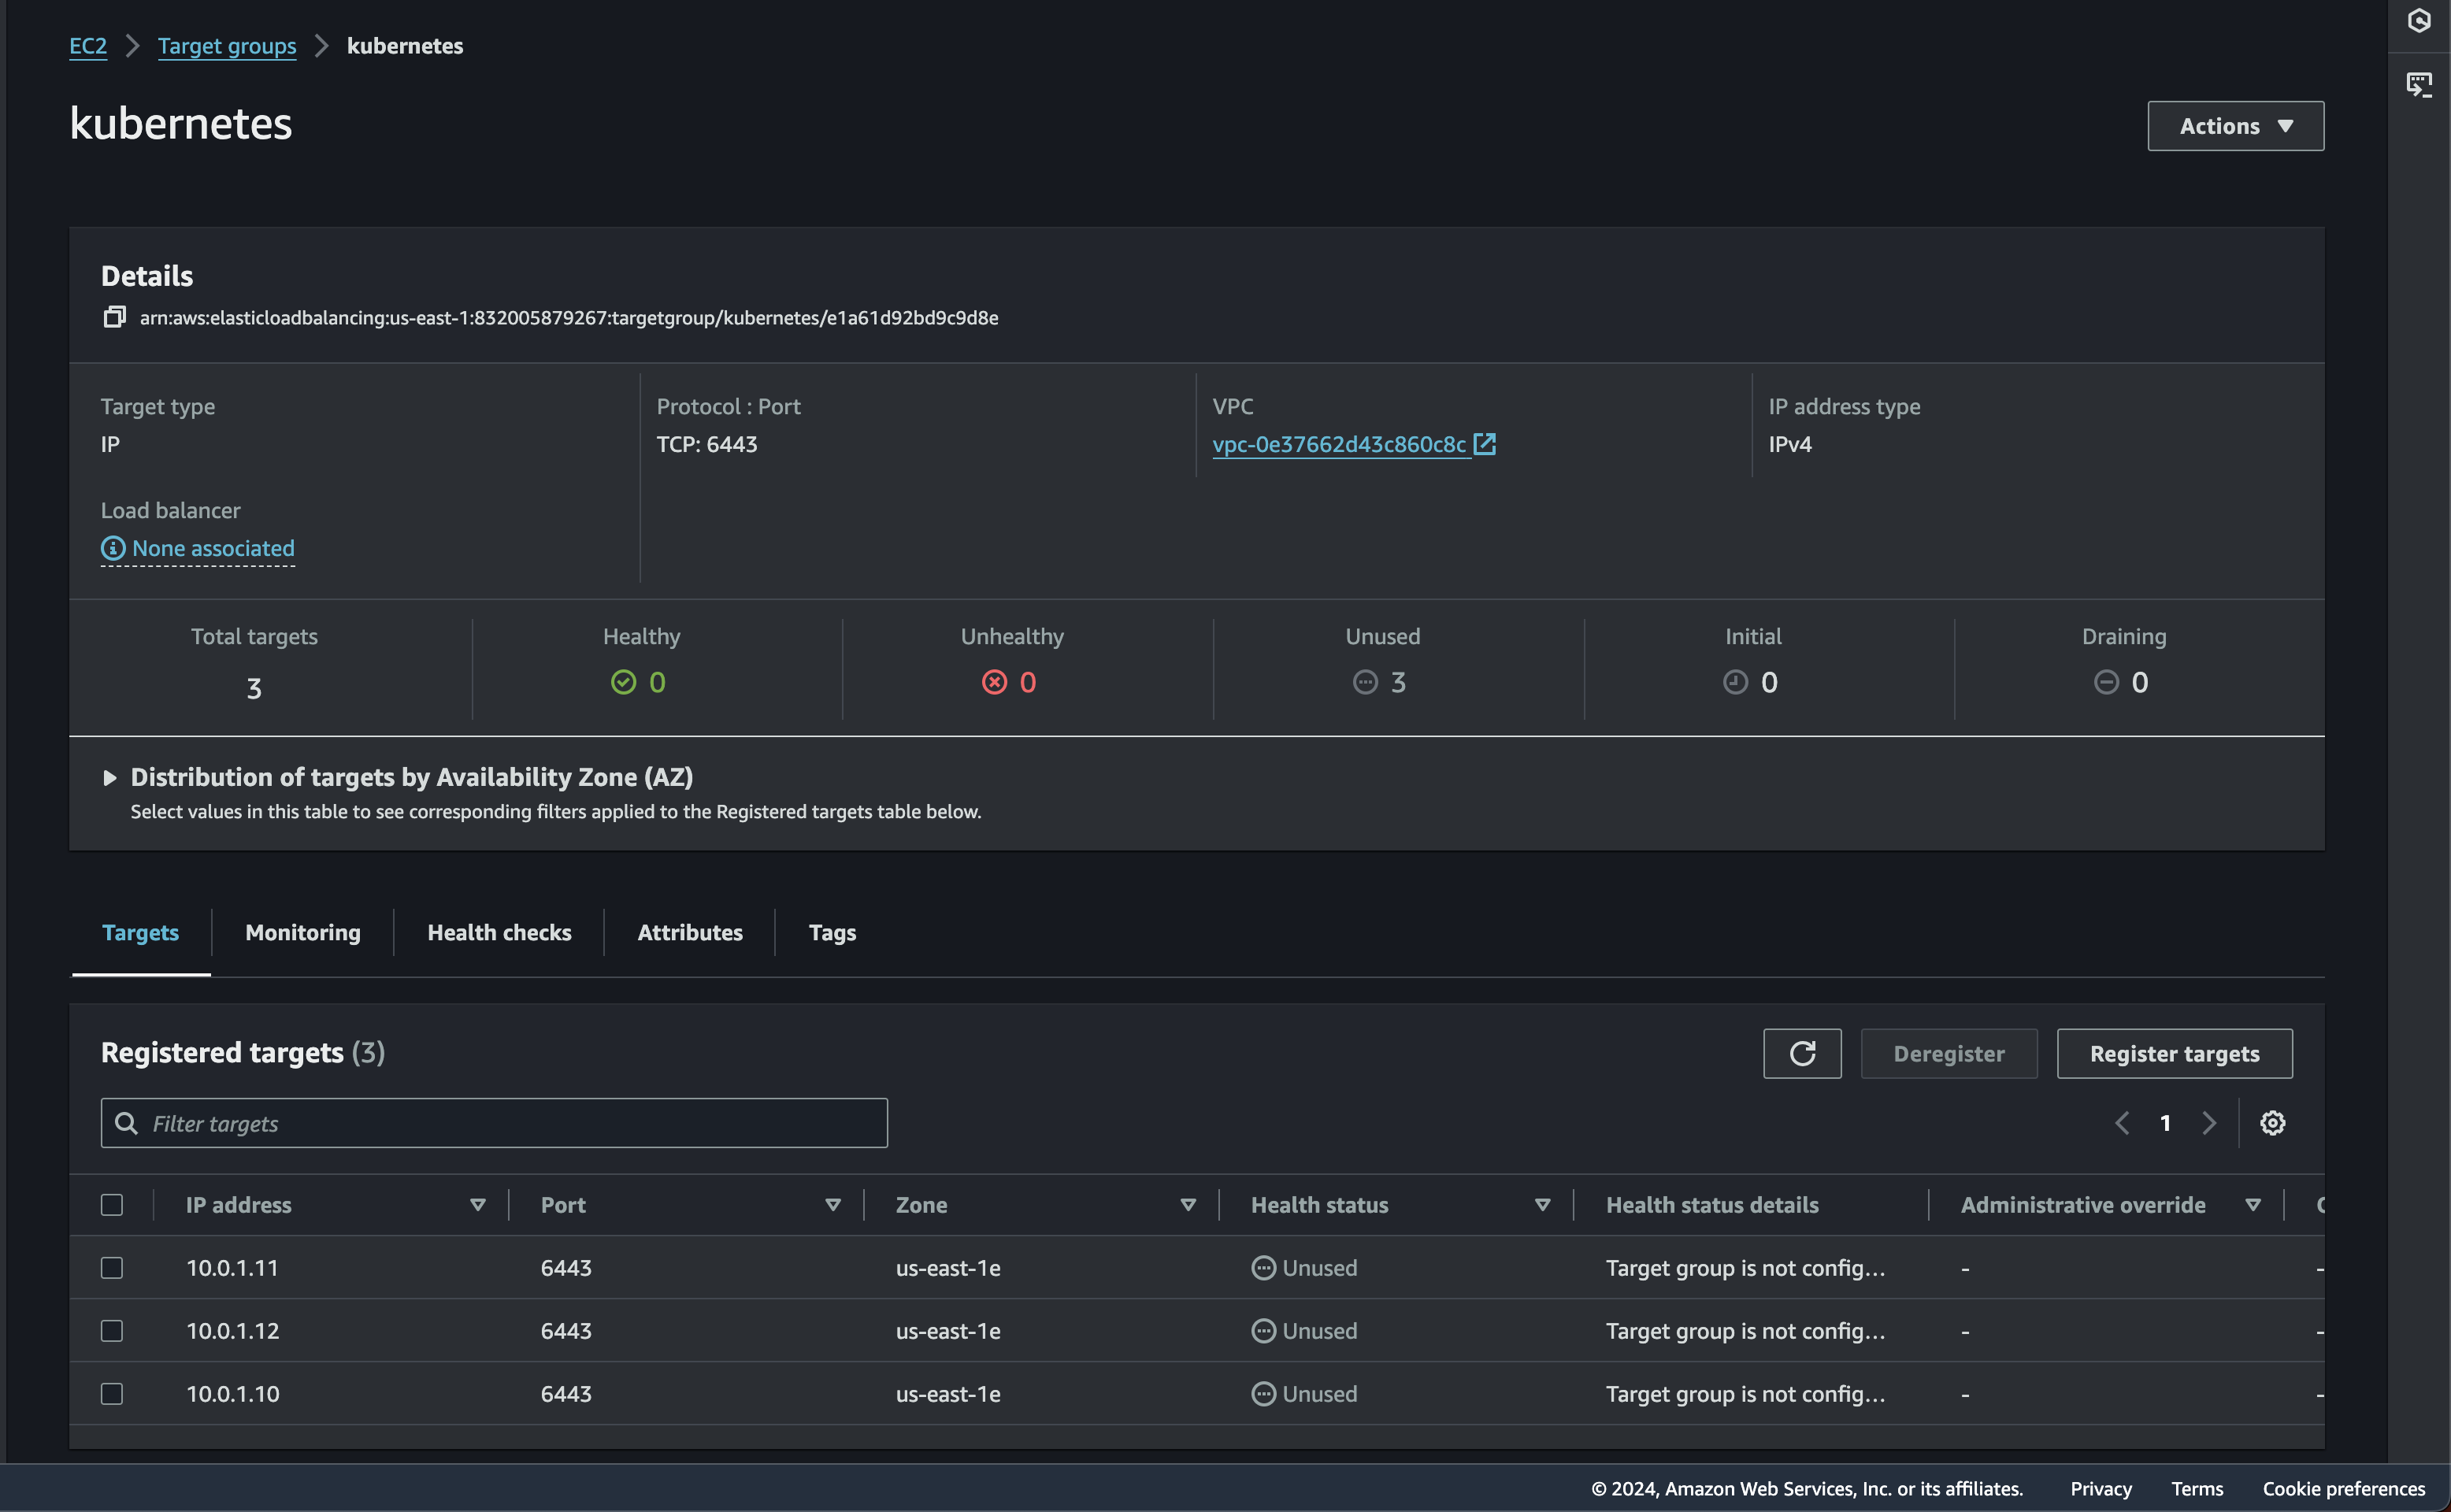
Target Group
Creating a target group
This will be used to define a group of targets (the controller nodes) that will receive traffic from the NLB. For now i will set the target is IP Addresses and will target the TCP Traffic on port 6443 (the Kubernetes API server port).

Registering Target
Next is to add controller nodes to target group. I will add three IP range 10.0.1.10, 10.0.1.11, and 10.0.1.12 (your controllers) as targets.

If everything is succeed then it will redirect to the target group page
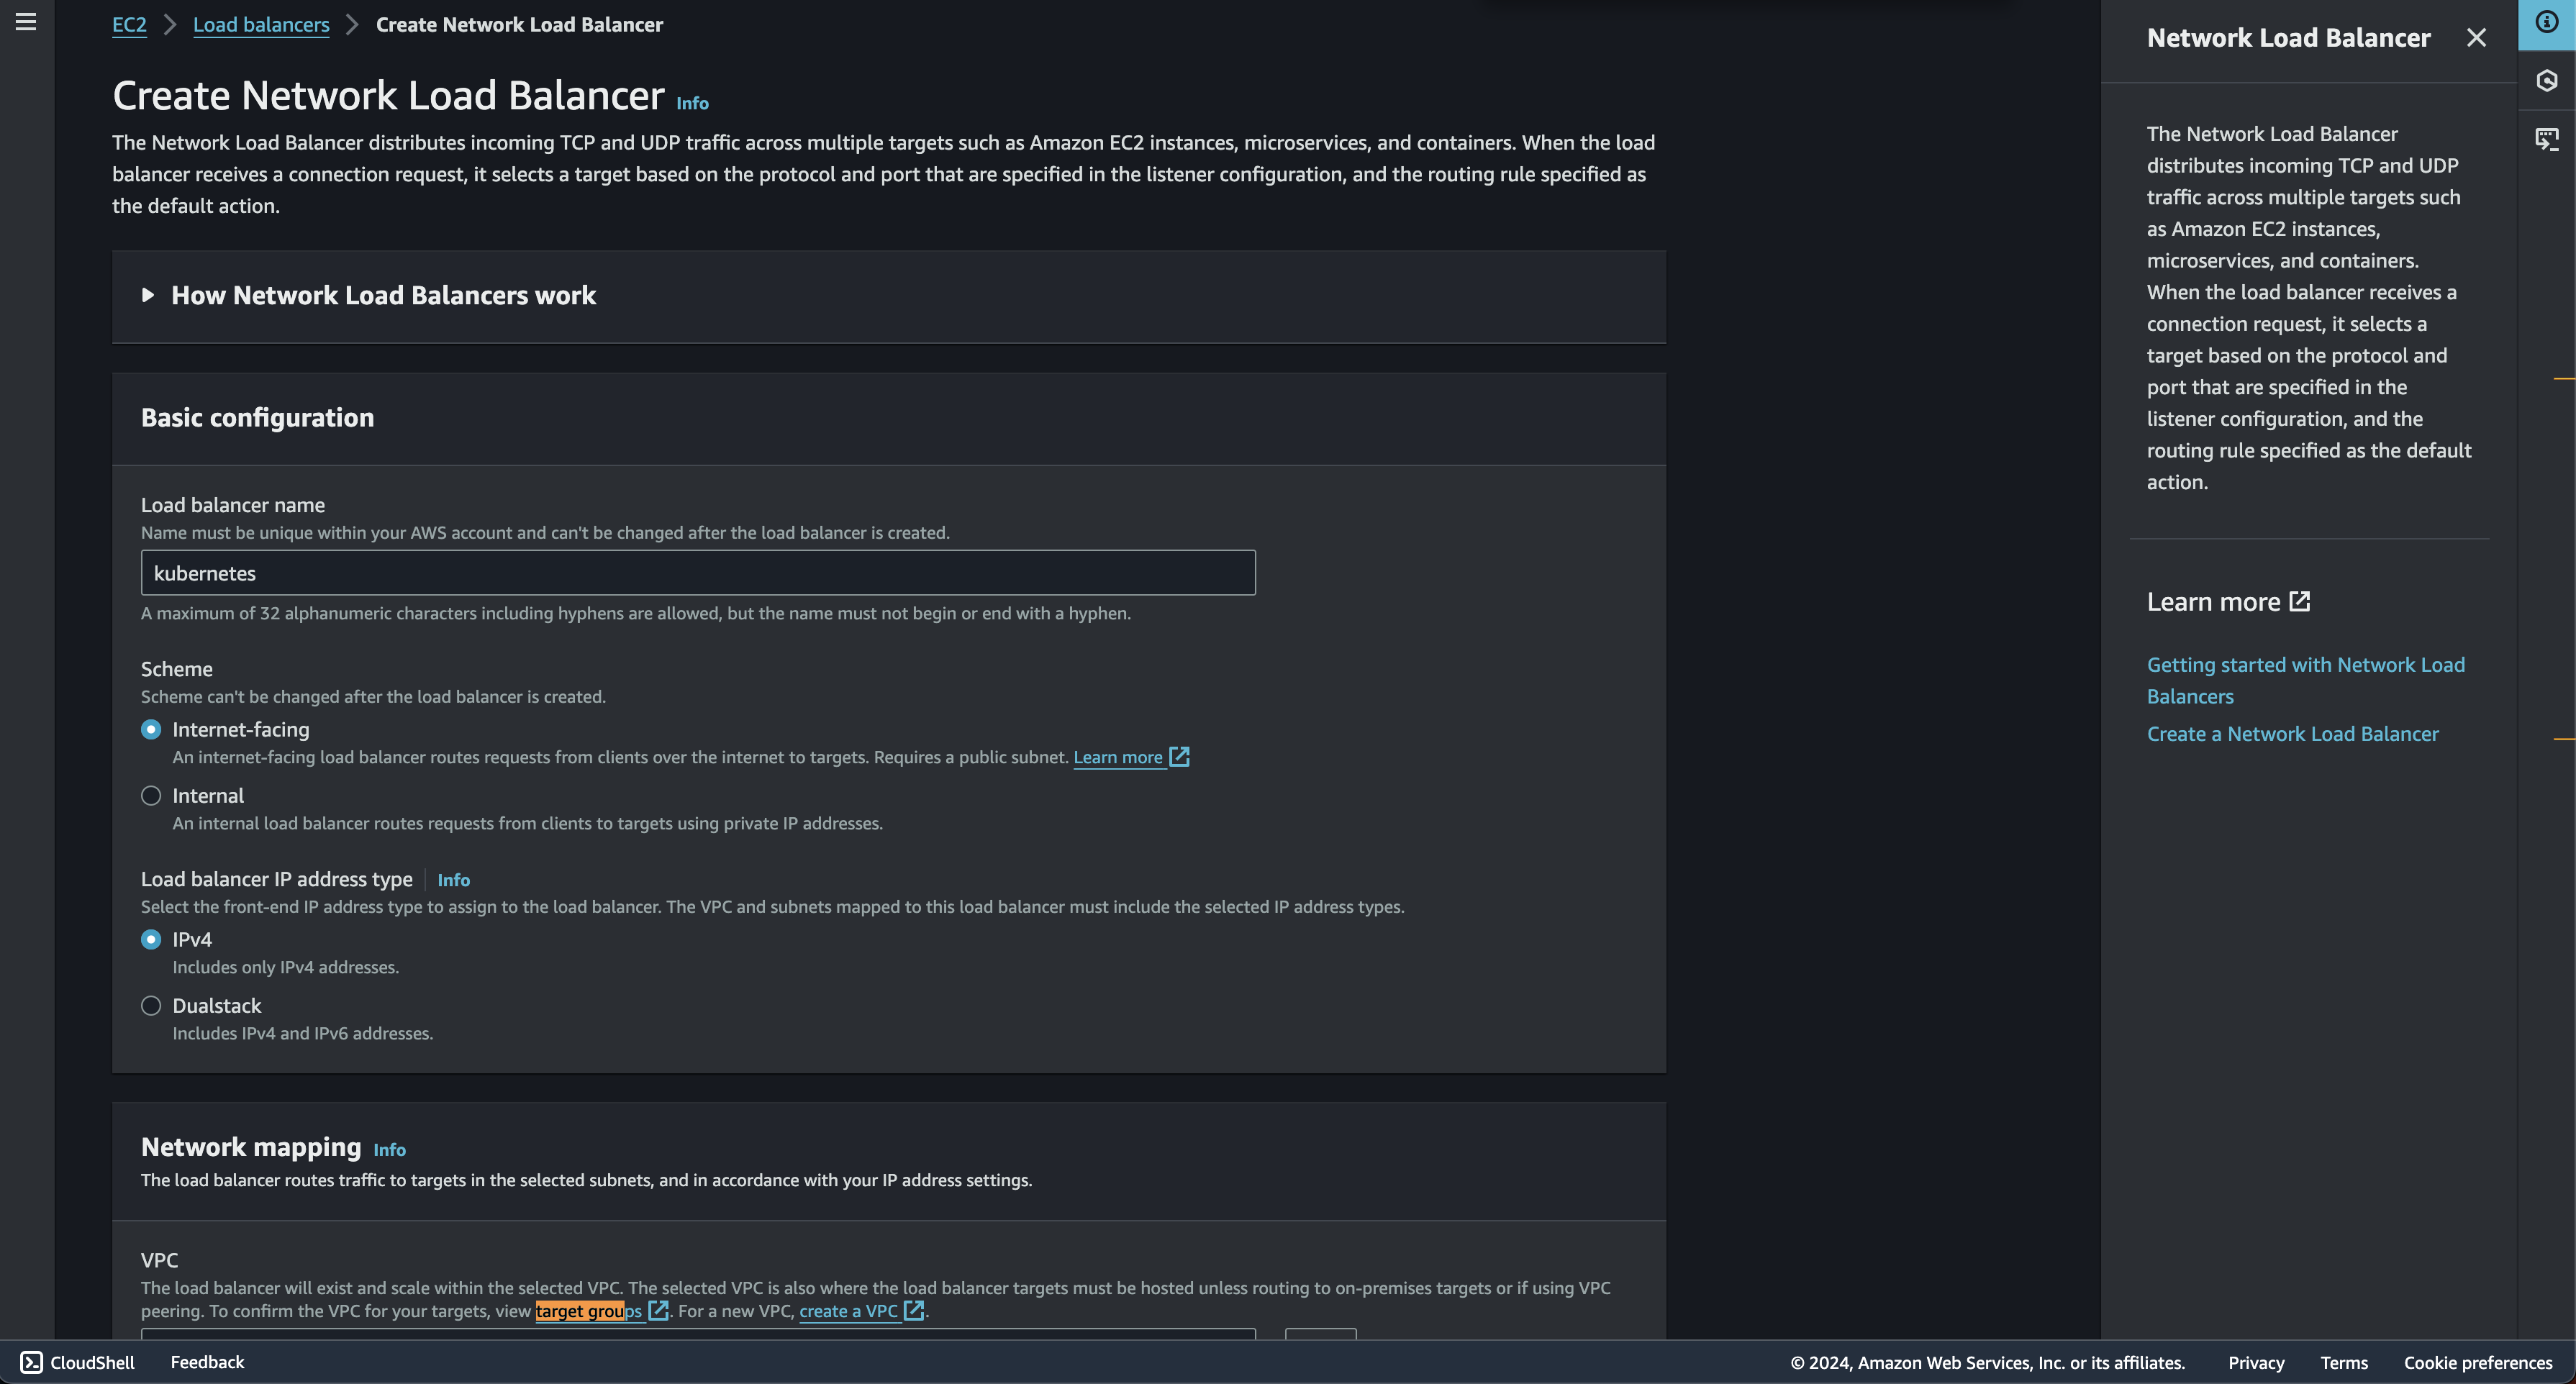
Creating a NLB
Create NLB
For NLB, i just following default setting without any changes. but 1 things to make sure is that we add our VPC to network mapping section
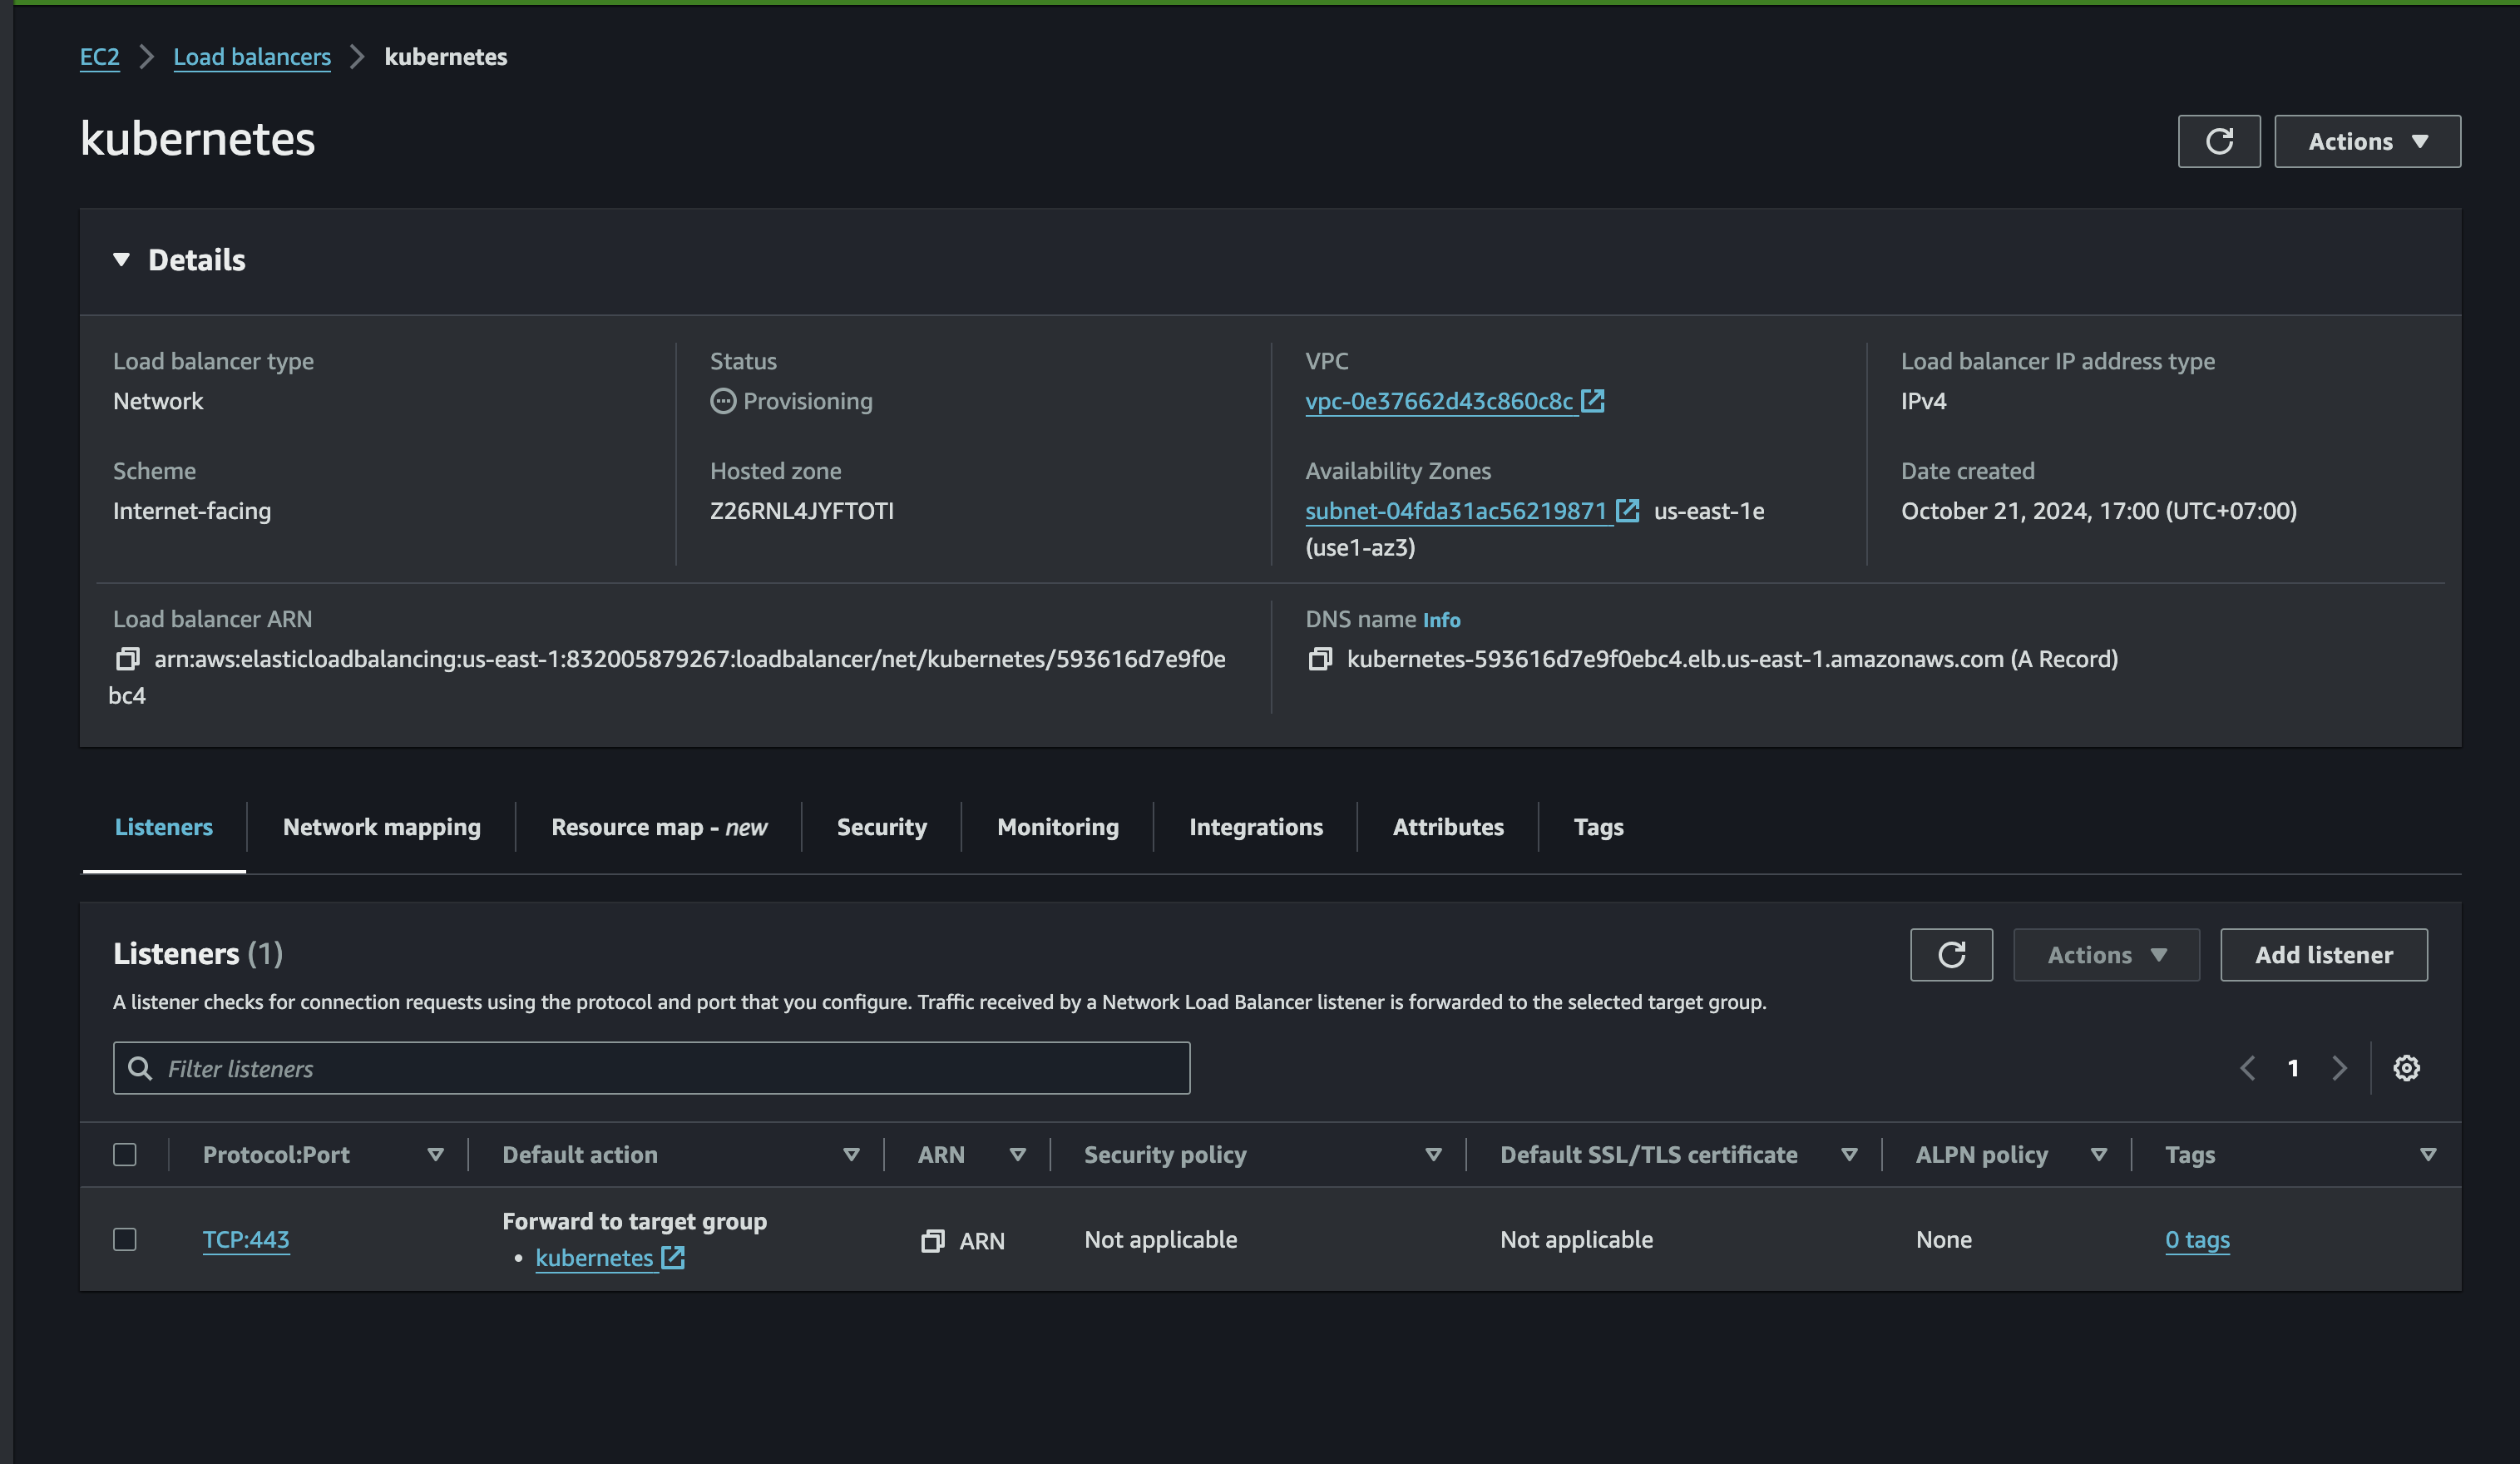
Create listeners
This configures the NLB to listen for traffic and forward it to the target group. When traffic arrives on port 443, the NLB will forward it to the "kubernetes" target group.
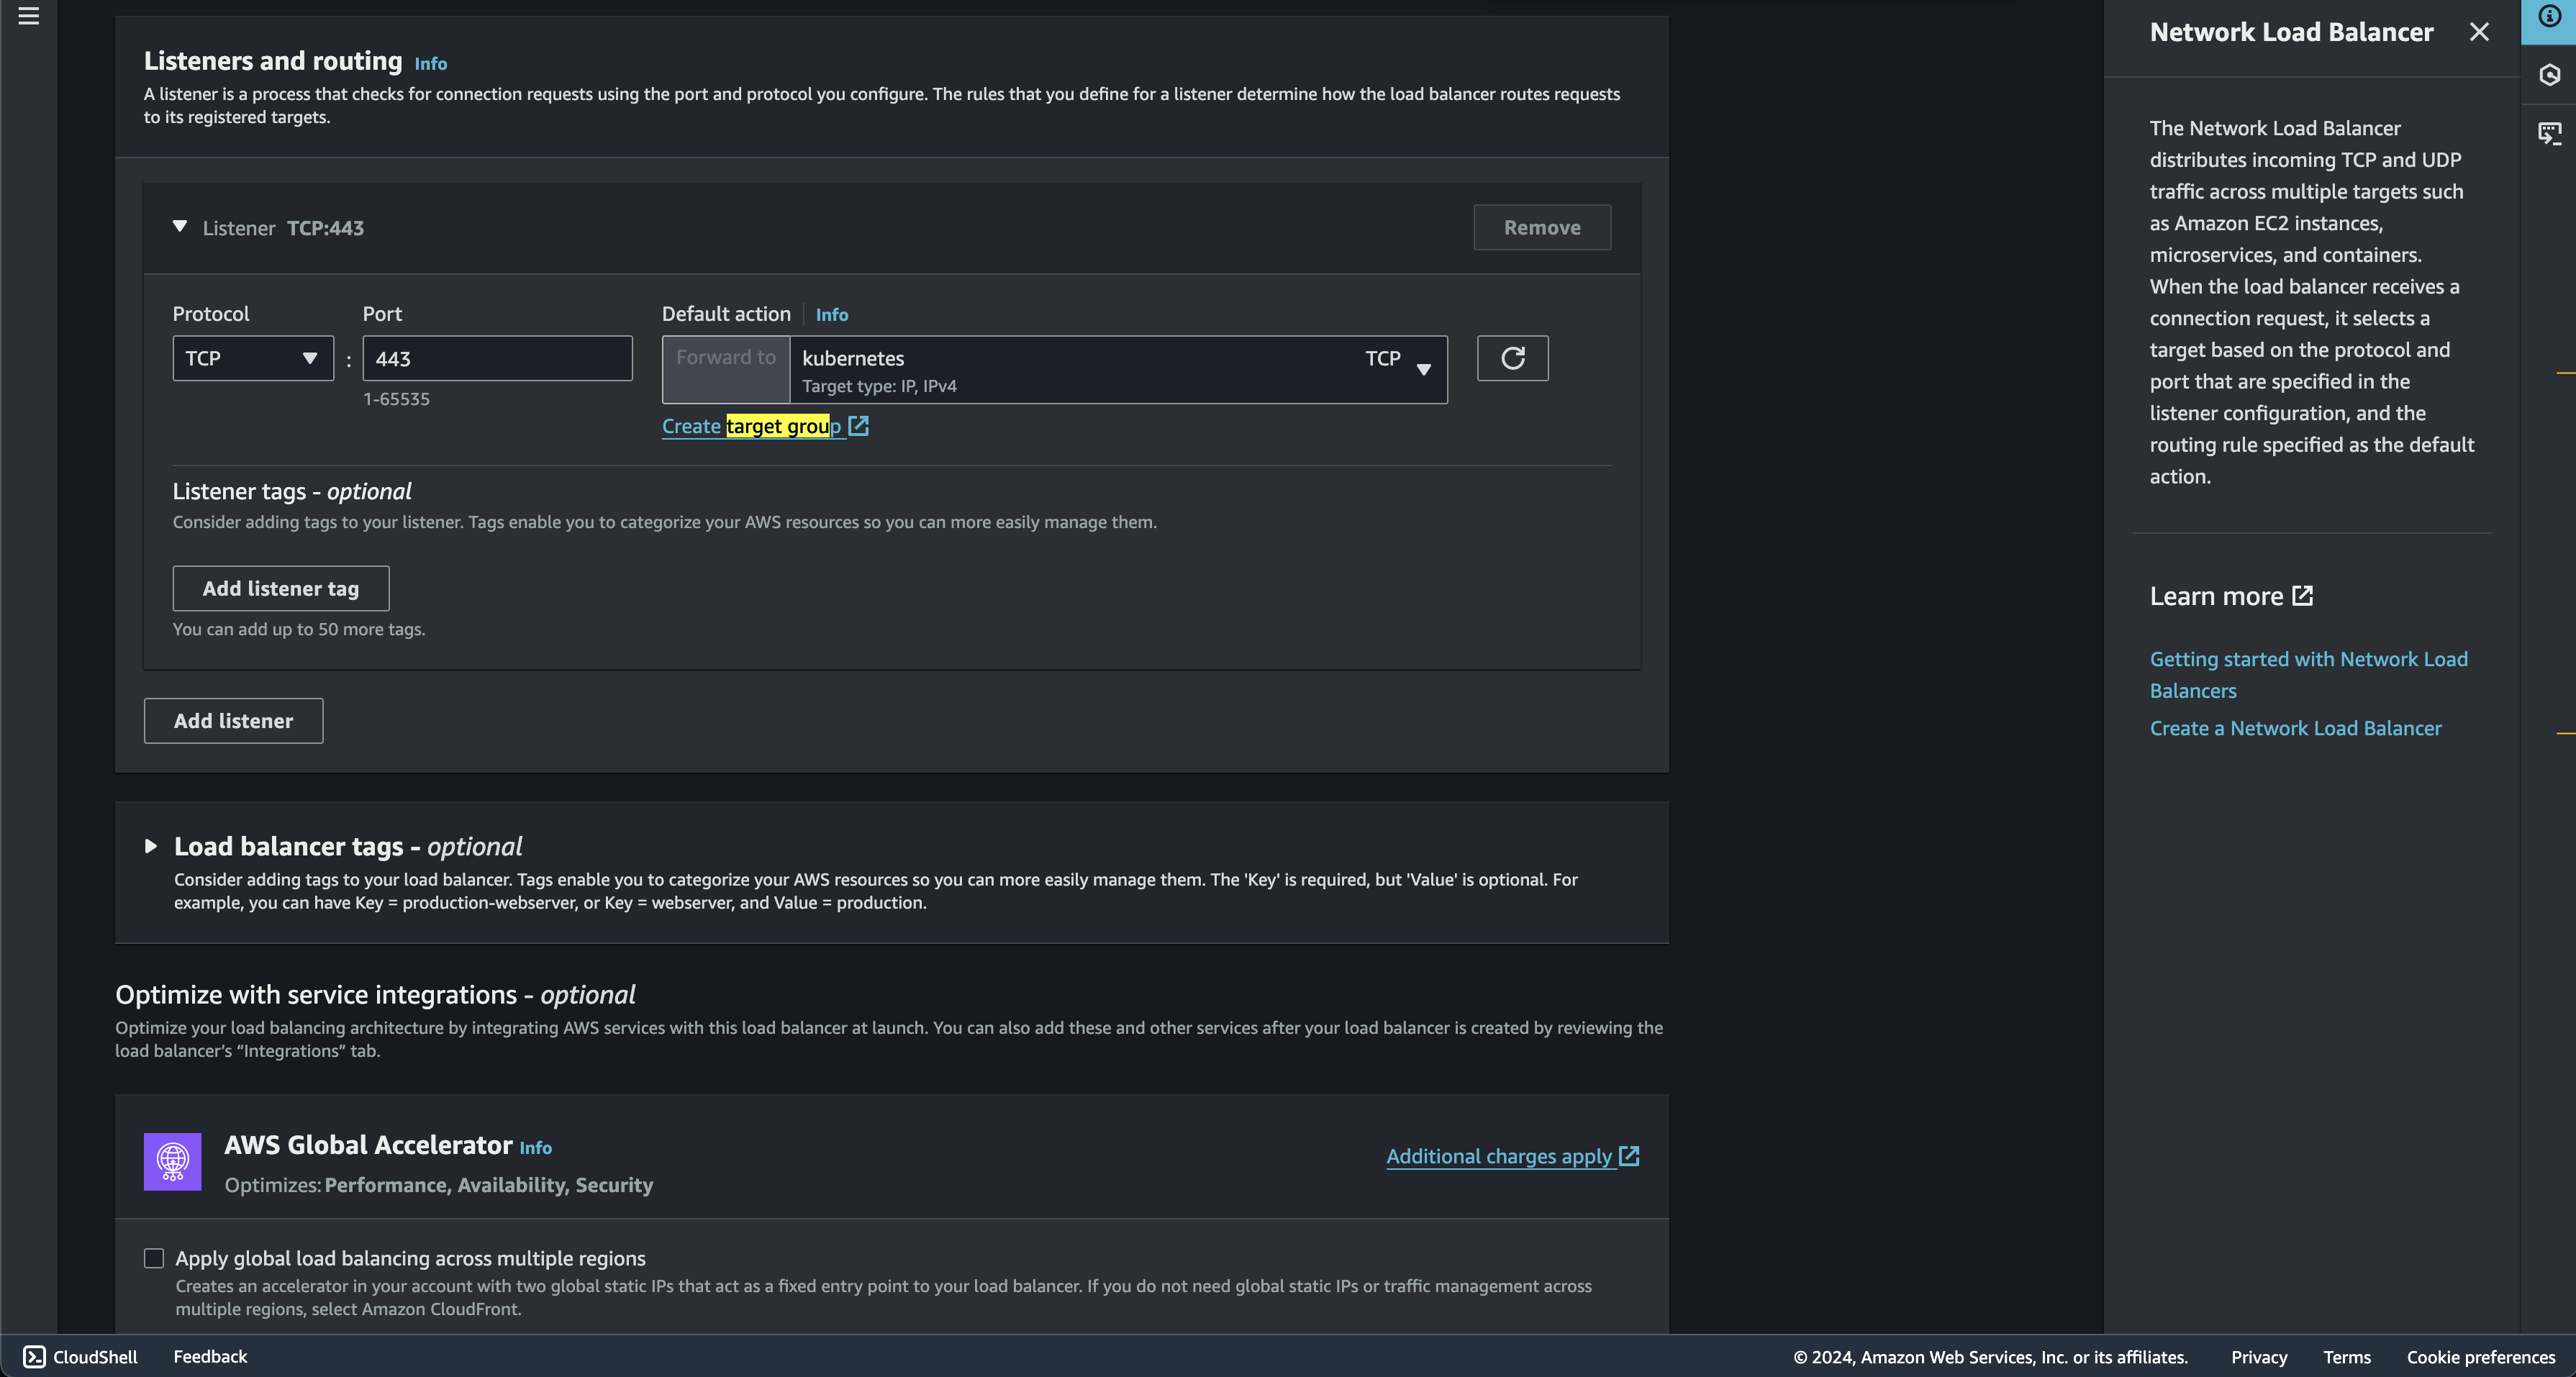
Load balancer will be created if no error. and we need to take attention on the DNS name that will be used later
NLB Conclusion
So, after setting it up. i will recap how will this be used in the kubernetes cluster.
- First is when user or application sends a request to the NLB's DNS name (which resolves to a public IP address).
- The NLB will later receives the request on port 443.
- Based on its listener configuration, the NLB selects a healthy target from the "kubernetes" target group (one of your controller nodes).
- Then The NLB forwards the request to the selected target's private IP address on port 6443.
- Finally The controller node processes the request and sends back a response, which gets routed back through the NLB to the original requester.
Create Compute Instances
Now lets begin to the most interesting part. In this session i will launch 6 EC2 instances. three for kubernetes controller nodes and three for kubernetes worker nodes. I will use t3.micro for this project. for the price itself for 24 hour usage it will consume around IDR 23.297 for all 6 instances. t3.micro have spesification of 2 CPU Core & 1 GB Memory. this should be enough for this tryout
0.0104 * 6 * 24 = 1.4976 USD per 24 Hour or 23.297 IDR
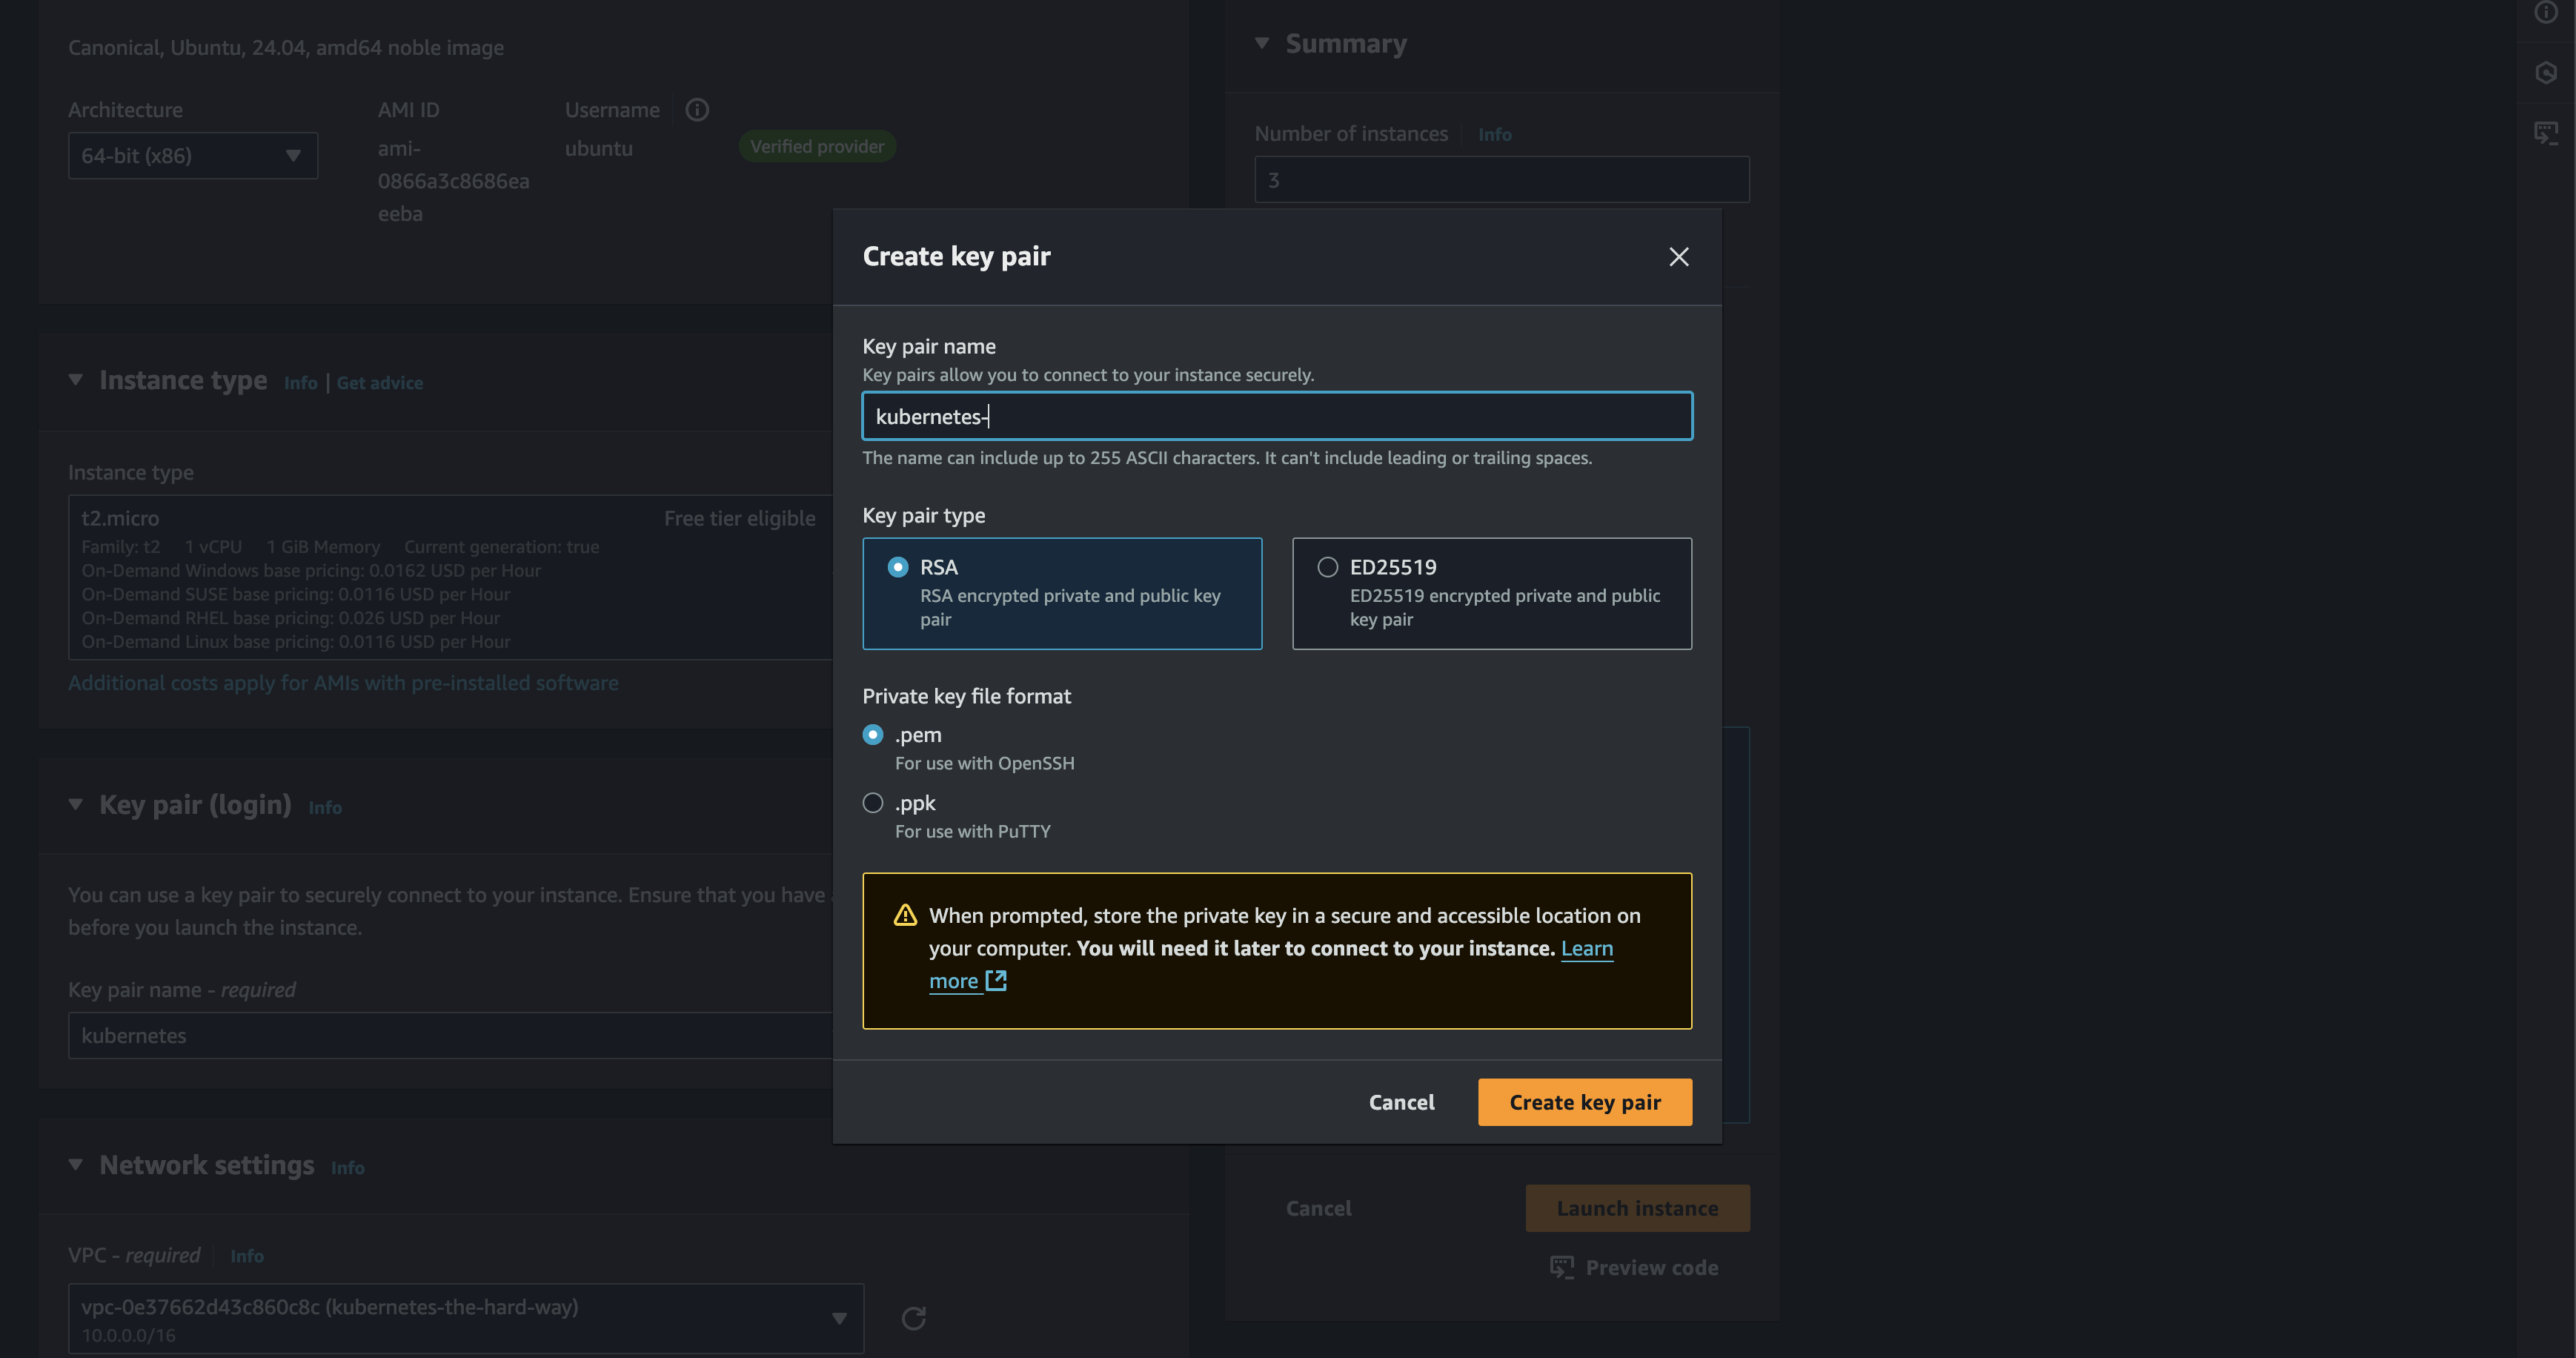
First, we need to generate SSH Key Pair to set the appropriate permission for secure access. this will produce file key_pair_name.pem
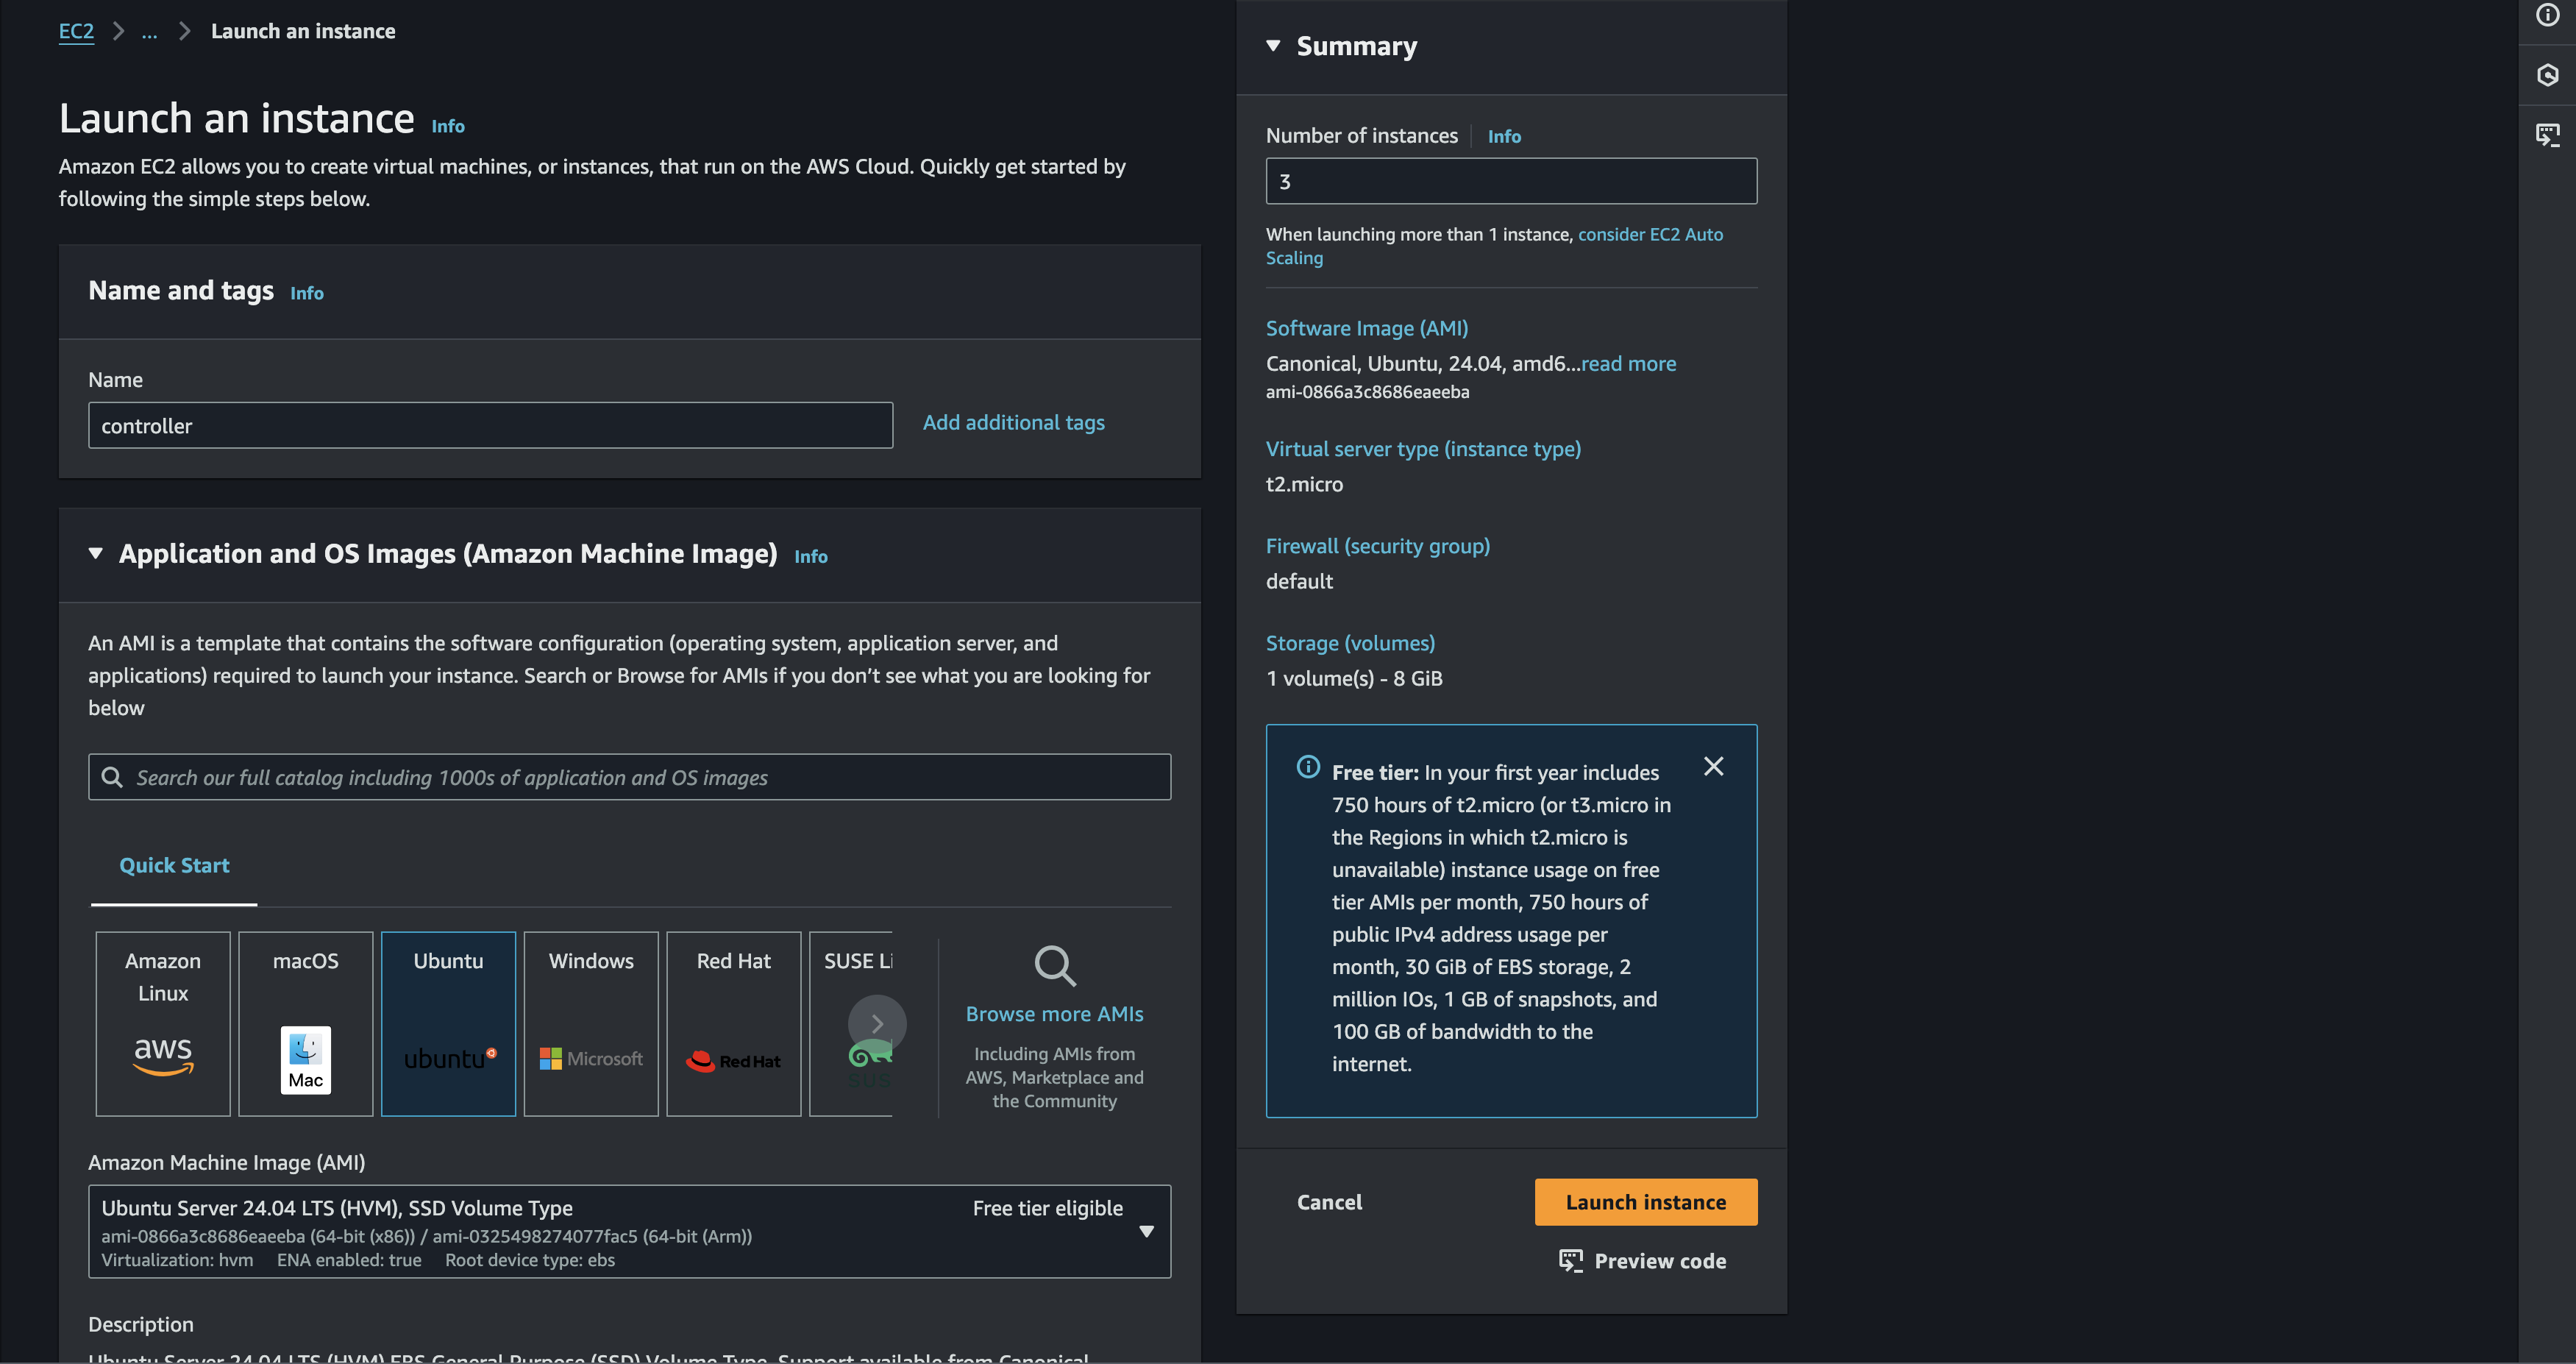
After that we can just proceed to generate the EC2 Instances. It should pretty straightforward process. Also i will use ubuntu OS instead the amazon for this project
Also dont forget to choose the VPC that already created before
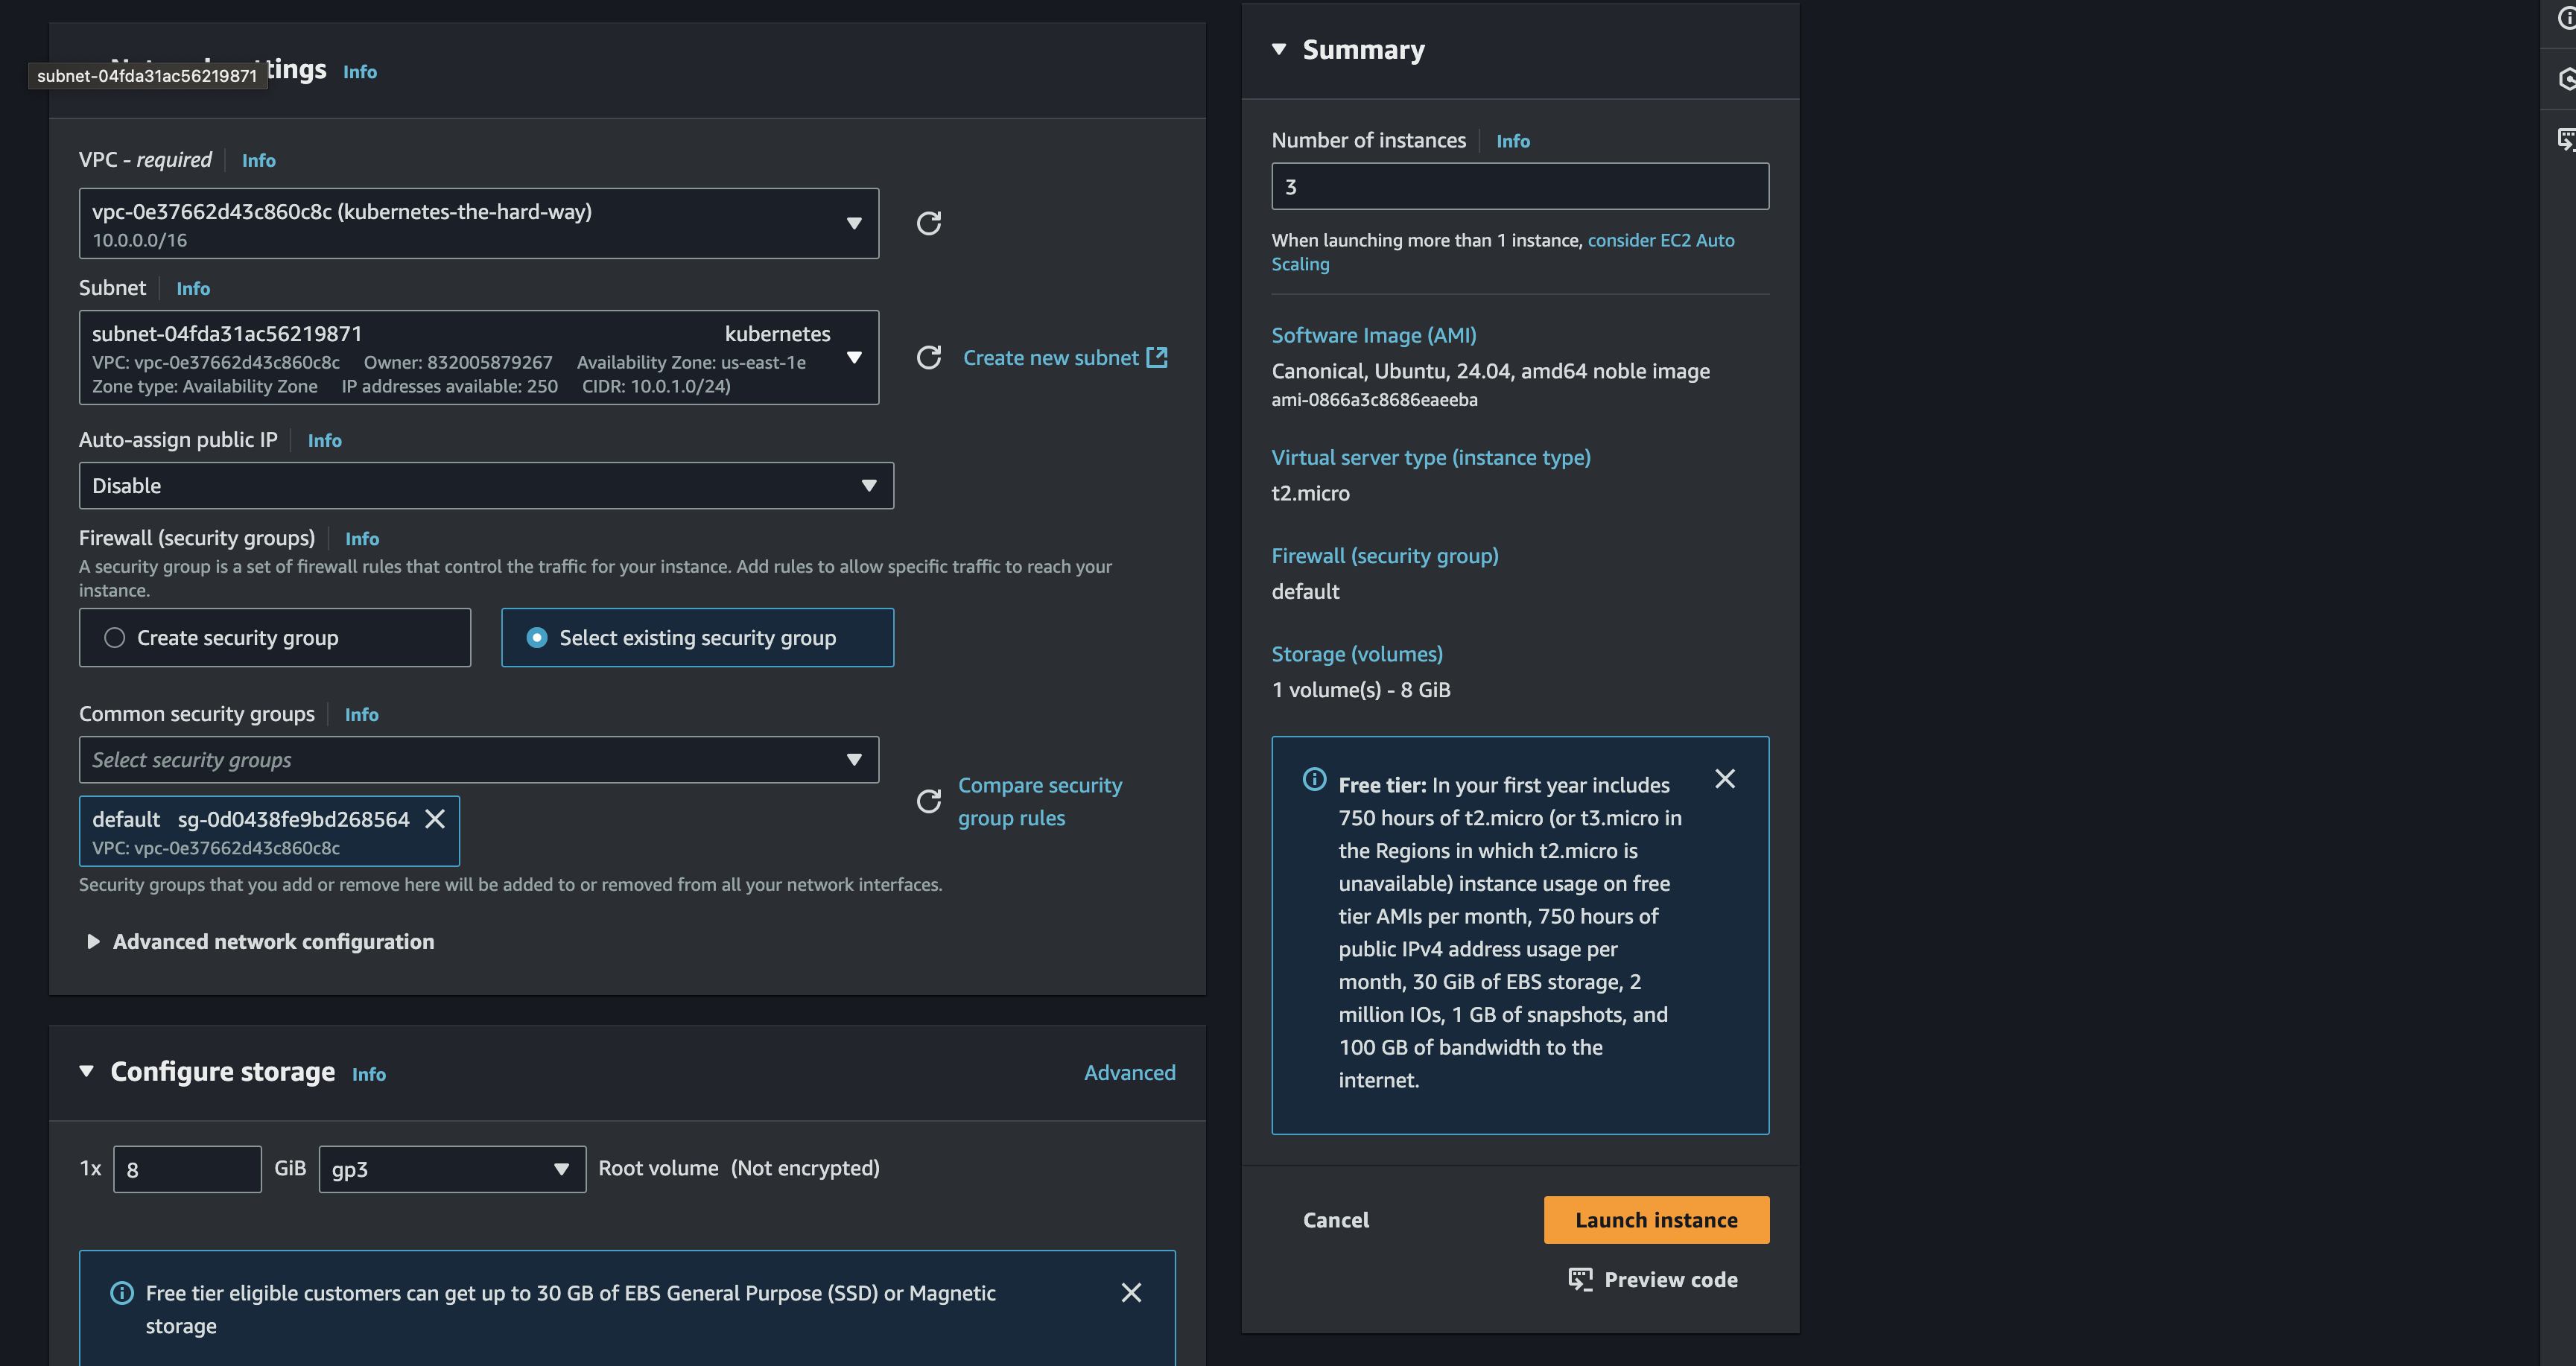
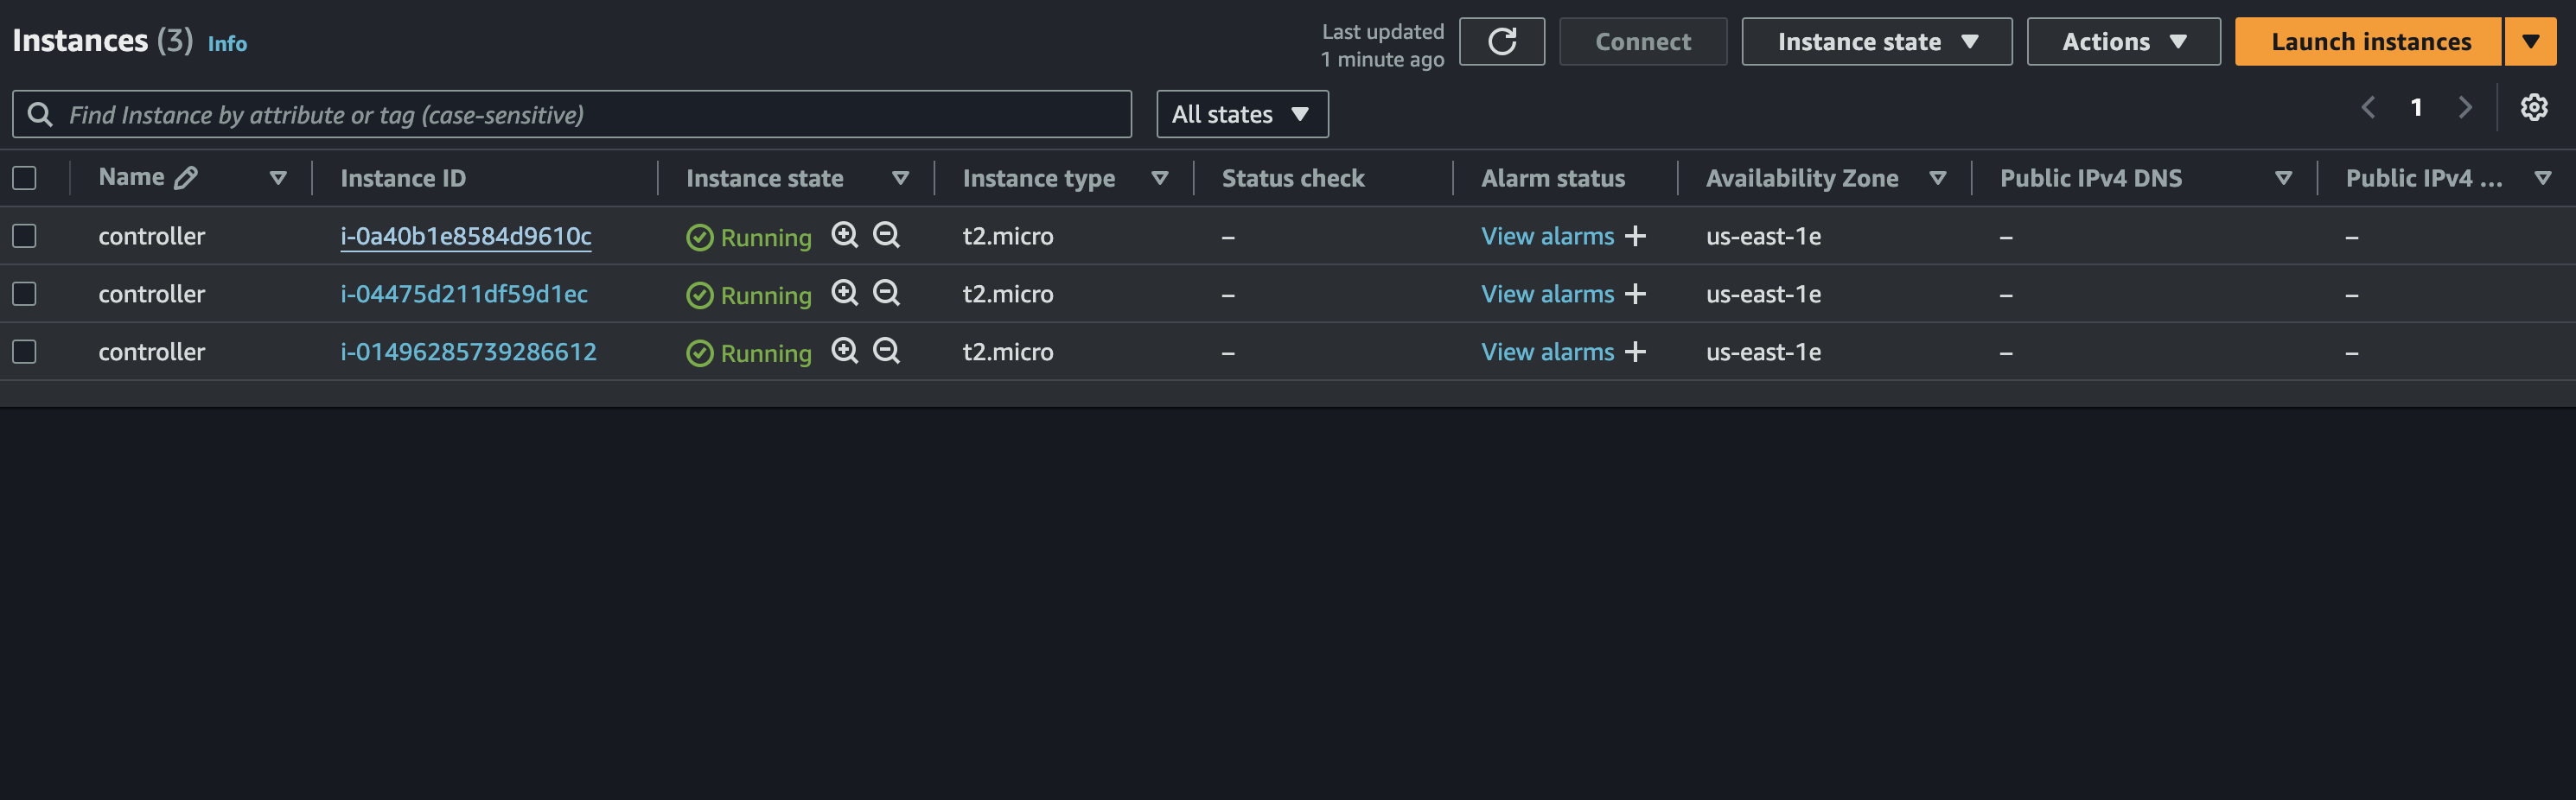
The controller instance will be created in a minute
Connect To Instances
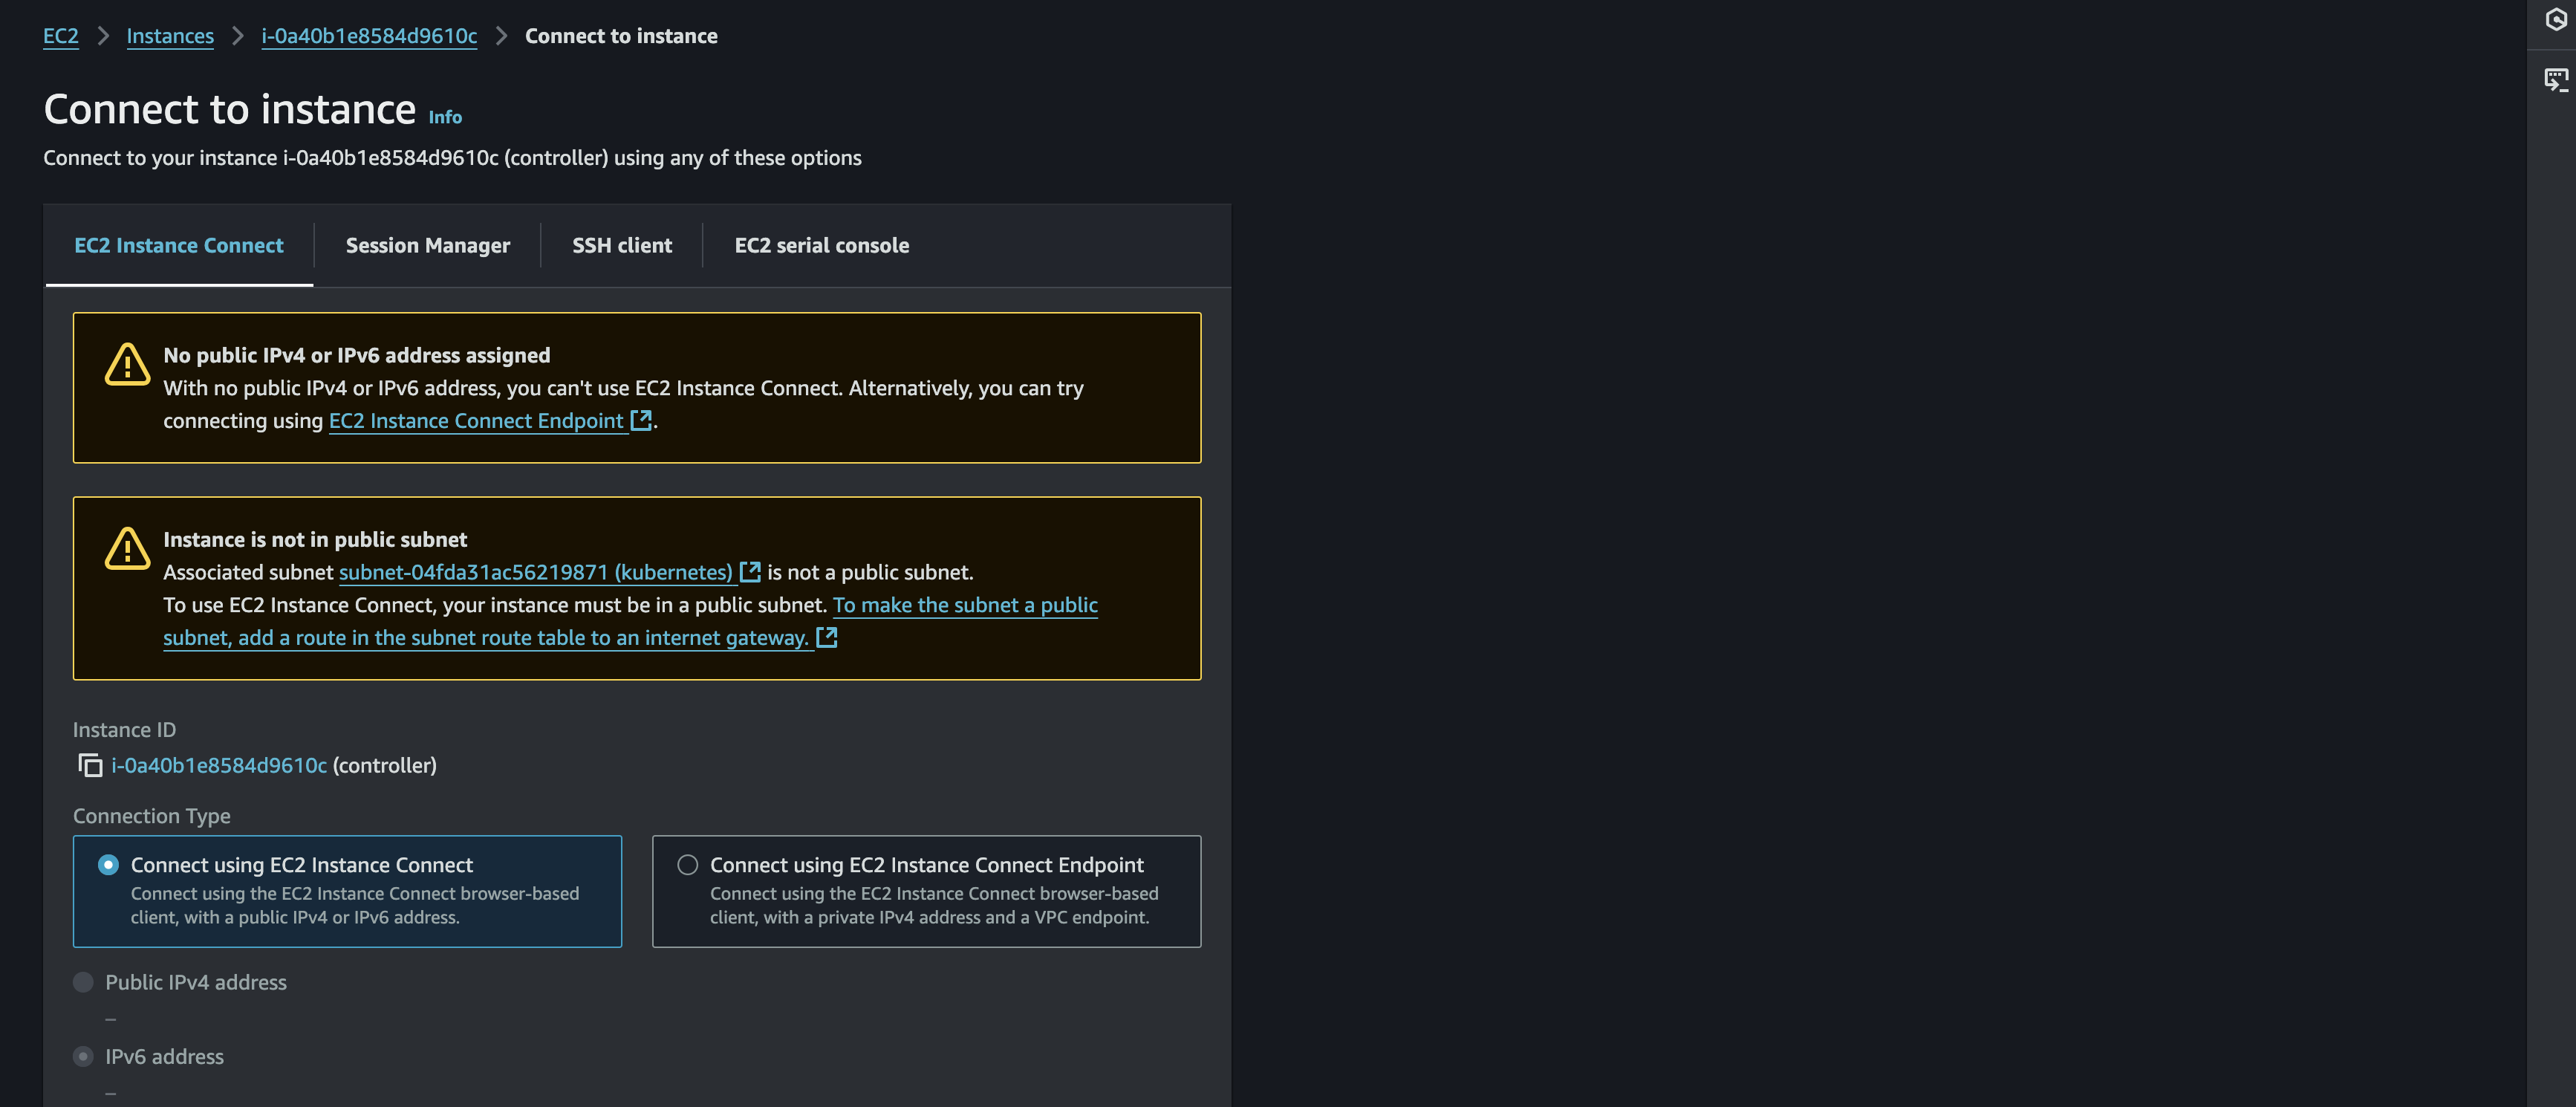
So after all the instance is created. How can we connect to each of it? There is several method that can be used to connect
SSH (Secure Shell)
I think this method is the most common to be used for connecting to EC2 Instance. since previously we already generate the key_pair.pem then we can try connecting to the EC2 instance
# Example SSH Command
ssh -i your-private-key.pem ubuntu@your-ec2-public-ip-address
EC2 Instance Connect
For simplified connect to instance we can use this method. This will be useful when need temporary access but don't want to manage permanent SSH keys, or the organization has policies restricting long-lived SSH keys.
# Example EC2 Instance Command
aws ec2-instance-connect send-ssh-public-key
Provisioning CA & TLS Certificates
Certificate Authority Setup
- CA Configuration (ca-config.json).
{
  "signing": {
    "default": {
      "expiry": "8760h"
    },
    "profiles": {
      "kubernetes": {
        "usages": ["signing", "key encipherment", "server auth", "client auth"],
        "expiry": "8760h"
      }
    }
  }
}
- CA Certificate Signing Request (ca-csr.json)
{
  "CN": "Kubernetes",
  "key": {
    "algo": "rsa",
    "size": 2048
  },
  "names": [
    {
      "C": "ID",
      "L": "Jakarta",
      "O": "system:nodes",
      "OU": "Kubernetes The Hard Way",
      "ST": "DKI Jakarta"
    }
  ]
}
- Generate CA Certificate
cfssl gencert -initca ca-csr.json | cfssljson -bare ca
This will generate the ca-key.pem & ca.pem
But question has to be asked. what exactly this cert role in the kubernetes cluster. I will describe it function
-
ca.pem: CA Certificate (Public Key) This is the public certificate of the root Certificate Authority. It's used to verify the authenticity of other certificates signed by this CA. Think of it as a trusted document that vouches for the identity of other certificates.
-
ca-key.pem: CA Private Key This file is extremely sensitive! The CA's private key is used to sign other certificate requests, turning them into valid and trusted certificates within your PKI (Public Key Infrastructure). Anyone with access to this key could create fraudulent certificates
Client and Server Certificates
Admin Client Certificate
After generating the CA-CSR. now its time to generate the Admin CSR. Similar to the CA CSR, this one is for the "admin" user.
- Admin CSR (admin-csr.json)
{
  "CN": "admin",
  "key": {
    "algo": "rsa",
    "size": 2048
  },
  "names": [
    {
      "C": "ID",
      "L": "Jakarta",
      "O": "system:nodes",
      "OU": "Kubernetes The Hard Way",
      "ST": "DKI Jakarta"
    }
  ]
}
- Generating The Cert
cfssl gencert \
  -ca=ca.pem \
  -ca-key=ca-key.pem \
  -config=ca-config.json \
  -profile=kubernetes \
  admin-csr.json | cfssljson -bare admin
This will generate the admin-key.pem & admin.pem
-
admin.pem: Admin Client Certificate (Public Key) This is the public certificate issued to the "admin" user. It identifies the admin user and their permissions when interacting with the Kubernetes cluster.
-
admin-key.pem: Admin Client Private Key This is the private key associated with the admin user's certificate. The admin user needs this key to prove their identity and access the cluster securely
Kubelet Client Certificates
To generate for 3 workers cert, i will use this script
for i in 0 1 2; do
  instance="worker-${i}"
  instance_hostname="ip-10-0-1-2${i}"
  cat > ${instance}-csr.json <<EOF
{
  "CN": "system:node:${instance_hostname}",
  "key": {
    "algo": "rsa",
    "size": 2048
  },
  "names": [
    {
      "C": "ID",
      "L": "Jakarta",
      "O": "system:nodes",
      "OU": "Kubernetes The Hard Way",
      "ST": "DKI Jakarta"
    }
  ]
}
EOF
This will produce each worker the .pem & .key.pem file. but we will need extra steps before generating the cert. external_ip and internal_ip of each instance is required in order to generate the right cert
# Fetch External IP
external_ip=$(aws ec2 describe-instances --filters \
    "Name=tag:Name,Values=${instance}" \
    "Name=instance-state-name,Values=running" \
    --output text --query 'Reservations[].Instances[].PublicIpAddress')

# Fetch Internal IP
internal_ip=$(aws ec2 describe-instances --filters \
    "Name=tag:Name,Values=${instance}" \
    "Name=instance-state-name,Values=running" \
    --output text --query 'Reservations[].Instances[].PrivateIpAddress')

# Generate Cert
cfssl gencert \
    -ca=ca.pem \
    -ca-key=ca-key.pem \
    -config=ca-config.json \
    -hostname=${instance_hostname},${external_ip},${internal_ip} \
    -profile=kubernetes \
    worker-${i}-csr.json | cfssljson -bare worker-${i}
Controller Manager Client Certificate
To generate for controllers manager, i will use this script
cat > kube-controller-manager-csr.json <<EOF
{
  "CN": "system:kube-controller-manager",
  "key": {
    "algo": "rsa",
    "size": 2048
  },
  "names": [
    {
      "C": "ID",
      "L": "Jakarta",
      "O": "system:nodes",
      "OU": "Kubernetes The Hard Way",
      "ST": "DKI Jakarta"
    }
  ]
}
EOF
# Generating Cert
cfssl gencert \
  -ca=ca.pem \
  -ca-key=ca-key.pem \
  -config=ca-config.json \
  -profile=kubernetes \
  kube-controller-manager-csr.json | cfssljson -bare kube-controller-manager
This will generate kube-controller-manager-key.pemkube-controller-manager.pem
The Kube Proxy Client Certificate
These certificates authenticate the kube-proxy component with the Kubernetes API server. kube-proxy itself runs on every worker node and is responsible for network proxying. It maintains network rules on nodes that allow Pods to communicate with each other and with external
cat > kube-proxy-csr.json <<EOF
{
  "CN": "system:kube-proxy",
  "key": {
    "algo": "rsa",
    "size": 2048
  },
   "names": [
    {
      "C": "ID",
      "L": "Jakarta",
      "O": "system:nodes",
      "OU": "Kubernetes The Hard Way",
      "ST": "DKI Jakarta"
    }
  ]
}
EOF
# Generating Cert
cfssl gencert \
  -ca=ca.pem \
  -ca-key=ca-key.pem \
  -config=ca-config.json \
  -profile=kubernetes \
  kube-proxy-csr.json | cfssljson -bare kube-proxy
This will generate the kube-proxy-key.pem & kube-proxy.pem
The Scheduler Client Certificate
kube-scheduler is responsible for assigning Pods (where the applications run) to worker nodes based on resource availability and other constraints. The certificates will be used by the kube-scheduler component to authenticate with the API server.
cat > kube-scheduler-csr.json <<EOF
{
  "CN": "system:kube-scheduler",
  "key": {
    "algo": "rsa",
    "size": 2048
  },
  "names": [
    {
      "C": "ID",
      "L": "Jakarta",
      "O": "system:nodes",
      "OU": "Kubernetes The Hard Way",
      "ST": "DKI Jakarta"
    }
  ]
}
EOF
# Generating Cert
cfssl gencert \
  -ca=ca.pem \
  -ca-key=ca-key.pem \
  -config=ca-config.json \
  -profile=kubernetes \
  kube-scheduler-csr.json | cfssljson -bare kube-scheduler
This will generate the kube-scheduler-key.pemkube-scheduler.pem
The Kubernetes API Server Certificate
This is a critical certificate, as it's used by the Kubernetes API server itself. The API server is the central control point of kubernetes cluster.
cat > kubernetes-csr.json <<EOF
{
  "CN": "kubernetes",
  "key": {
    "algo": "rsa",
    "size": 2048
  },
  "names": [
    {
      "C": "ID",
      "L": "Jakarta",
      "O": "system:nodes",
      "OU": "Kubernetes The Hard Way",
      "ST": "DKI Jakarta"
    }
  ]
}
EOF
## define DNS names for kubernetes
KUBERNETES_HOSTNAMES=kubernetes,kubernetes.default,kubernetes.default.svc,kubernetes.default.svc.cluster,kubernetes.svc.cluster.local

## Generate cert
cfssl gencert \
  -ca=ca.pem \
  -ca-key=ca-key.pem \
  -config=ca-config.json \
  -hostname=10.32.0.1,10.0.1.10,10.0.1.11,10.0.1.12,${KUBERNETES_PUBLIC_ADDRESS},127.0.0.1,${KUBERNETES_HOSTNAMES} \
  -profile=kubernetes \
  kubernetes-csr.json | cfssljson -bare kubernetes
This will generate the kubernetes-key.pem & kubernetes.pem
The Service Account Key Pair
cat > service-account-csr.json <<EOF
{
  "CN": "service-accounts",
  "key": {
    "algo": "rsa",
    "size": 2048
  },
  "names": [
    {
      "C": "US",
      "L": "Portland",
      "O": "Kubernetes",
      "OU": "Kubernetes The Hard Way",
      "ST": "Oregon"
    }
  ]
}
EOF
cfssl gencert \
  -ca=ca.pem \
  -ca-key=ca-key.pem \
  -config=ca-config.json \
  -profile=kubernetes \
  service-account-csr.json | cfssljson -bare service-account
Distribute the Client and Server Certificates
If all the cert is ready. Now its time to share the cert to each 3 worker and 3 controller. To doing it we can create a simple sh script to scp loop between each machine
Cert for workers
for instance in worker-0 worker-1 worker-2; do
  external_ip=$(aws ec2 describe-instances --filters \
    "Name=tag:Name,Values=${instance}" \
    "Name=instance-state-name,Values=running" \
    --output text --query 'Reservations[].Instances[].PublicIpAddress')

  scp -i kubernetes.id_rsa ca.pem ${instance}-key.pem ${instance}.pem ubuntu@${external_ip}:~/
done
Cert for controllers
for instance in controller-0 controller-1 controller-2; do
  external_ip=$(aws ec2 describe-instances --filters \
    "Name=tag:Name,Values=${instance}" \
    "Name=instance-state-name,Values=running" \
    --output text --query 'Reservations[].Instances[].PublicIpAddress')

  scp -i kubernetes.id_rsa \
    ca.pem ca-key.pem kubernetes-key.pem kubernetes.pem \
    service-account-key.pem service-account.pem ubuntu@${external_ip}:~/
done